How to Protect a Perimeter
Post-incident investigations focus on past events ("Whatever happened, happened"). Real-time analytics, by contrast, focuses on what is happening right now. Real-time alerts are typically used for events that pose a meaningful public safety risk and may require immediate response from an authorized agency or operator. The example below demonstrates how IREX can support this workflow by continuously providing real-time notifications about intrusion attempts into a restricted area.
Use the following workflow:
- Select cameras to monitor the perimeter, ensuring they meet the technical requirements.
- Set up video analytics on those cameras.
- Create and configure a workspace (alarm monitor) where intrusion events will be displayed as they arrive.
- Review Incoming Alarms on the monitor, and configure on-screen notifications.
Install a Camera
We assume the IREX user can choose the camera placement for perimeter surveillance. Correct placement is critical because it directly affects image quality and, ultimately, overall system accuracy and reliability.
The video analytics module performs best under the following conditions:
- Camera mount: fixed only (no PTZ, mobile phone uploads, or drones).
- Resolution: from 1280x720 (HD Ready) to QHD 2592x1944.
- Frames per second: 10 - 30 fps.
- Contrast object vs background: 20%.
- Tilt: +15° to +90°
- Pan: -75° to +75°
- Roll -5° to +5°
- Image quality within the region of interest: over 50 px/m
- Height: from 3 to 15 meters above the ground level.
-
Minimum detected object size:
- 1024 (32Х32) px for abandoned bags and humans
- 2025 (45Х45) px for vehicles
If cameras are already installed, validate that these requirements are met as closely as possible.
Set Up the Video Analytics
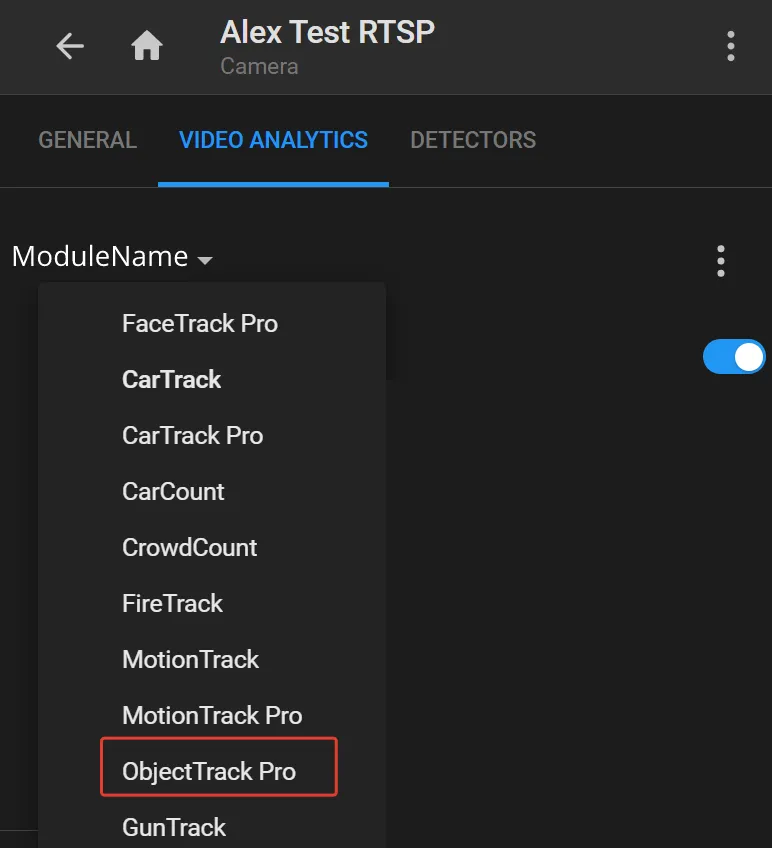
ObjectTrack Pro is recommended for this task. To enable and configure it:
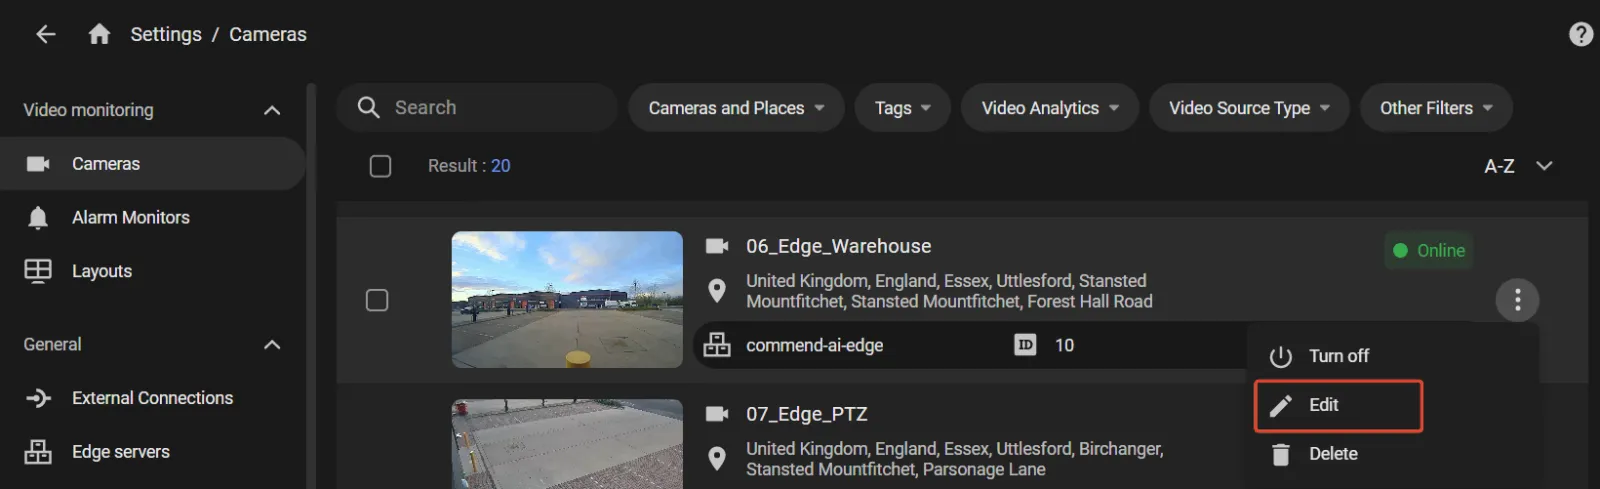
- In User menu > Settings > Cameras , locate the camera and select Edit from the three-dot menu.
- Open the VIDEO ANALYTICS tab in the camera settings pane on the left, then select the module from the detectors list as shown.
-
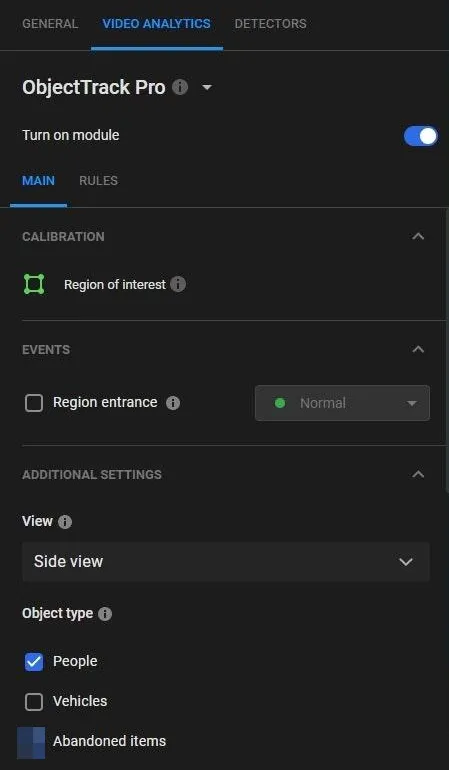
Slide the On/Off switch to the right

- Click Apply at the bottom of the pane. The camera settings panel opens.
- On the MAIN sub-tab, define the following parameters:
- On the RULES sub-tab, click Add rule and select Line crossing .
- On the Line crossing rule card, enter a descriptive rule name (for example, "Perimeter intrusion").
- Draw the signal line (the line that must not be crossed) by dragging the default orange shape onto the frame.
- Click Apply.
To delete a vertex, double-click it.
To add a vertex on an edge, double-click where the vertex should be.
To move the entire region, place the cursor inside it and drag it.
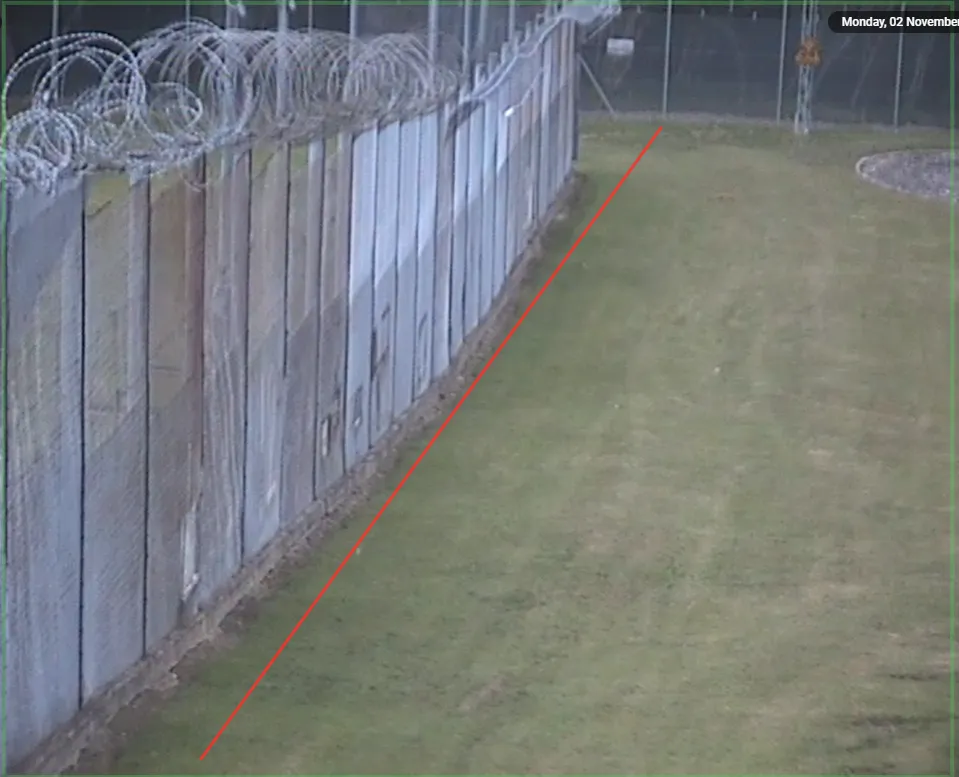
Other event types can also be used to signal intrusion attempts, such as Motion in region and Region entrance.
Learn More.
Build an Alarm Monitor
An alarm monitor is a workspace that displays incoming events in real time so operators can respond quickly to perimeter intrusions. To create an alarm monitor:
- On the main screen, open User menu - Settings.
- On the Alarm monitors screen, click the "+" icon in the bottom-right corner.
- Provide a clear monitor name (for example, “Playground intrusions”) in the Name field. In Description, enter a brief response protocol (a reminder of how to react when an alarm appears). Configure any other required monitor settings.
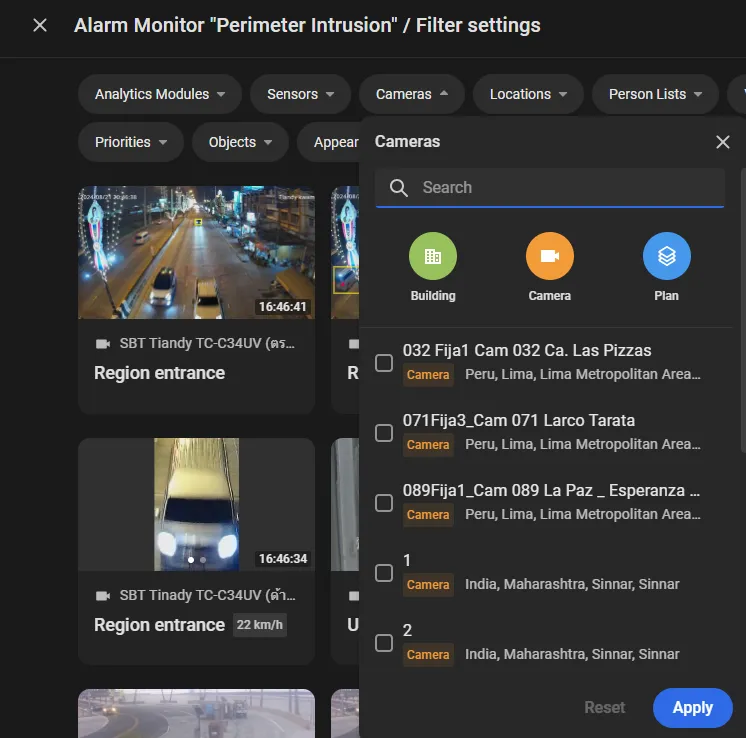
- Click Create, then click Set filters on the next screen. A filter panel opens to define which events are shown on the monitor.
- Under Cameras, select the cameras used for perimeter control, then click Apply.
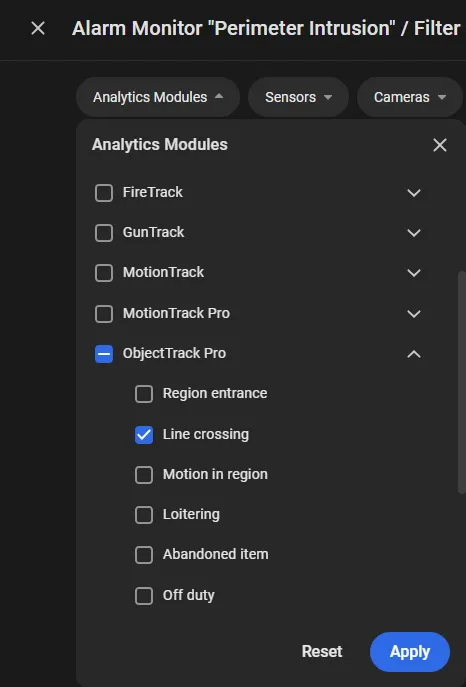
- Under Analytics modules, select ObjectTrak Pro - Line crossing, then click Apply.
- Click Apply filters.
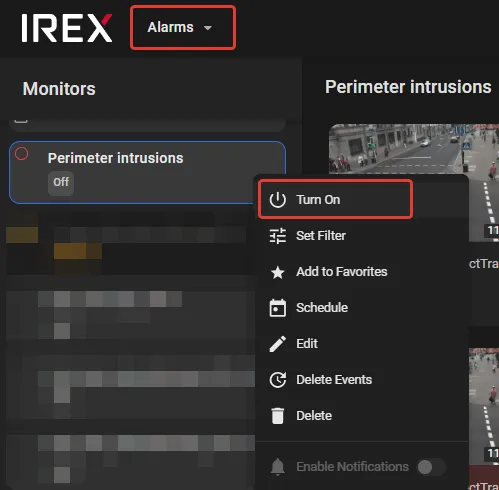
- A newly created monitor is off by default. Turn it on from the Alarms screen.
The new alarm monitor screen opens.

Review Incoming Alarms
- On the Alarms screen, select Perimeter intrusions on the left to display intrusion event cards on the right.
- Click a card to open the event details panel on the right. Review the details and determine whether off-screen response is required.
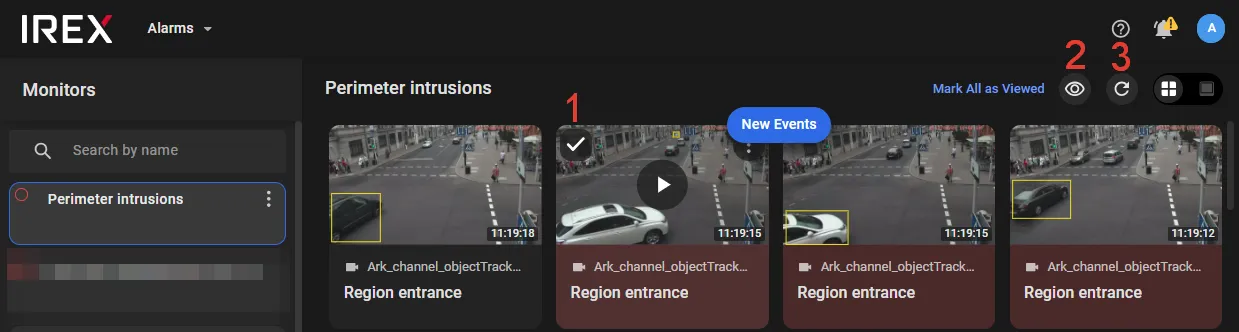
- Click 1 to mark the alarm as read and remove its highlight.
- If the screen contains many read alarms, click 2 to hide them.
- While existing alarms are under review, new alarms do not appear unless 3 (Auto-update) is enabled. Toggle Auto-update based on how long it takes to review alarms, how frequently they arrive, and the operating procedures in place.