
Explore Your Workspace
This is what the IREX front page looks like in the card view:
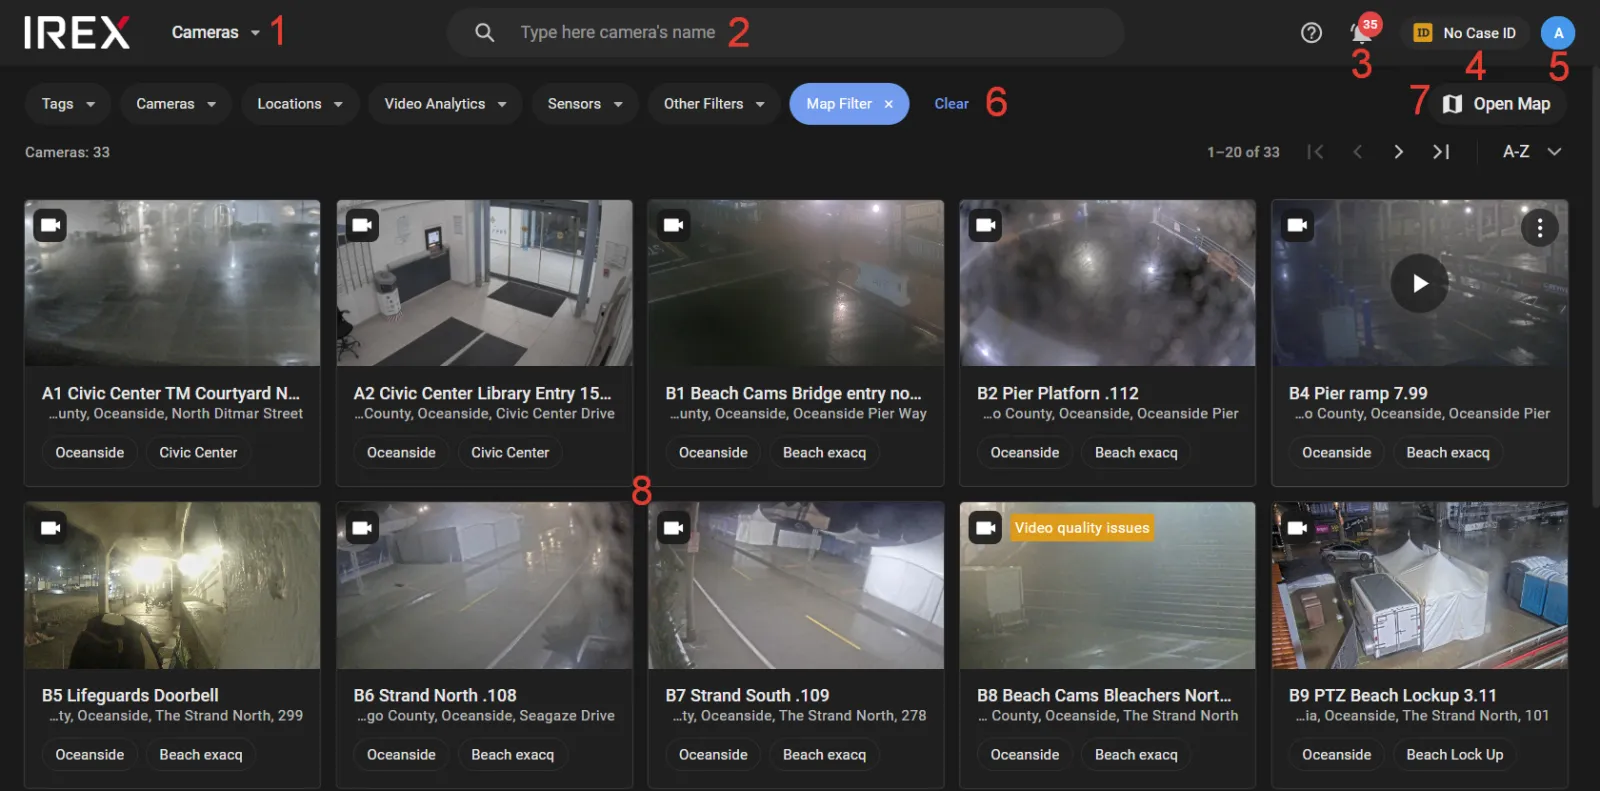
The key elements of the screen are:
- 1 — the main menu
- 2 — the search tool
- 3 — the new alarm/monitor blocked indicator
- 4 — the Case ID indicator
- 5 — the user menu
- 6 — the filter toolbar
- 7 — the card-to-map view switch
- 8 — camera cards pane
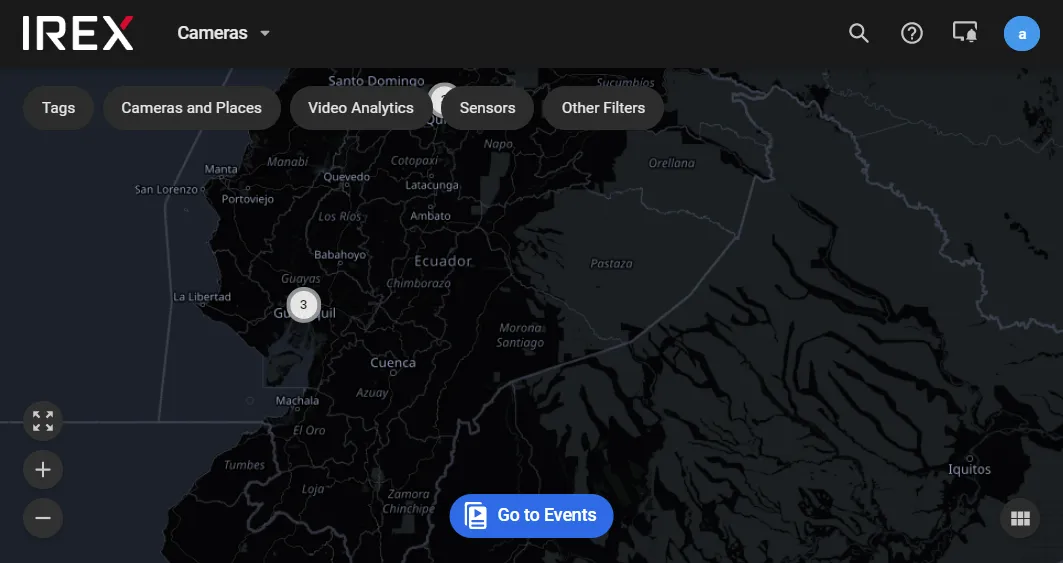
Click Open map to switch to the map view:
Use the Main Menu
Use the main menu commands (1) as follows:
| Command | Effect |
|---|---|
| Cameras | Displays cameras in map or card view. |
| Events | Opens the recent events screen. |
| Alarms | Opens the recent alarms screen. |
| Traffic violations | Opens the traffic violations screen. |
| Layouts | Opens the layout management screen. |
| Gallery | Opens the video gallery. |
| People | Provides access to the person database. |
| Vehicles | Provides access to the vehicle database. |
| Logbook | Opens the Logbook |
Filter Cameras to Show/Hide
On the Cameras screen, use the filter toolbar to control which cameras are displayed:
- Tags — Filter by camera tags (e.g., “3rd Floor”).
- Cameras and places: cameras by name, address, floor plan, or building. Tabs: Cameras, Addresses, Plans, Buildings. See Search cameras and places on the map.
- Resource Groups: filter by the selected resource groups.
- Video Analytics — Filter by enabled analytics modules (e.g., Face Recognition).
- Sensors — Filter by camera type (Fixed, PTZ, Thermal, Mobile, etc.).
- Other Filters — Filter by resolution and status (Online, Signal lost, Disabled, etc.).
- Map — Indicates that not all cameras are currently visible within the map area.
Navigate on the Map
- To pan the map, click and drag using the left mouse button.
- To zoom, use the "+" / "–" buttons or the mouse wheel.
Find a Camera
To locate a camera, enter its ID, name, or RTSP address in the search field (2) and press Enter.
Camera Card
On the Cameras page, in Show Cards mode, the camera-card layout was improved. The camera name and status icon are in the card header.
A camera card contains the following:
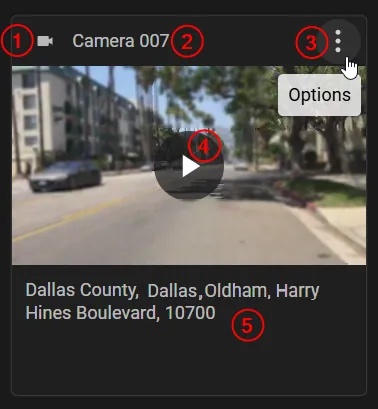
1 — Status icon. Hovering over the icon shows the camera status. For the Video issues status, the issue type is shown, for example Scene too bright or Low frame rate. For cameras with the Online status, the icon matches the sensor type.
2 — Camera name.
3 — Options icon (the menu items can differ by sensor type):
- Go to Events: opens the Events page. The All tab opens, with this camera selected in the Cameras and places filter.
- Device settings: opens the camera settings page. See Manage cameras.
- Video Analytics settings: opens the video analytics settings page for the camera. See Manage video analytics.
4 — Button that opens playback in the player. The button appears when the pointer hovers over the card. For cameras with the Disabled and Signal lost statuses, a default system image appears in place of the video frame.
5 — Camera installation address.
Watch Video in the Media Player
Click a camera card to open the media player and stream live video.
The video playback control bar includes the following tools.

1 — Video timeline. Move the timeline with the < > buttons or by dragging with the left mouse button held down.
2 — Archive recording timeline. Blue segments show intervals that contain archive video. Clicking a point on the timeline starts archive playback from that point.
4 — Pause / play video. When an event video is paused, a yellow box appears on the frame around the selected event’s vehicle, person, or abandoned item. The box is hidden during playback.
The box appears only for video streamed over WebSocket.
5 — Previous frame within the playback buffer. Frame stepping helps select the clearest frame near the current position, such as a better view of a license plate or face. Pressing the control pauses playback. Also available with the keyboard shortcut: <.
6 — Next frame within the playback buffer. Pressing the control pauses playback. Also available with the keyboard shortcut: >.
7 — Rewind playback by 10 seconds.
8 — Mute / unmute and volume control.
9 — Live video playback.
10 — Date and time of the playing video segment.
11 — Opens the calendar to select the video date and time.
12 — Timeline scale selection.
13 — Video image zoom.
14 — PTZ camera controls.
15 — Full-screen video.
16 — Opens the options list:
- Save to Gallery: select a video segment to save to the Gallery for later download.
- Copy video link: copies a link tied to the current playback time.
- Download current frame: downloads the full current video frame as JPEG.
- Playback speed: select playback speed.
- Camera settings: opens the camera settings page. See Manage cameras.
- Video Analytics settings: opens the video analytics settings page for the camera. See Manage video analytics.
- Go to Events: opens the Events page with the selected camera as the Cameras and places filter parameter.
- Video source: switches the playback source to Server or Camera archive. The option appears only for cameras of an ONVIF device that has access to the archive on the cameras enabled. To play back the archive stored on the camera, select Camera archive. If the camera was created only for viewing archive on the camera, the switch is unavailable, and the player uses the archive on the camera.
- Show nearby cameras: opens the Nearby cameras panel for switching to the video of cameras near the current one.
17 — Opens / closes the events panel.
Nearby Cameras
The Nearby cameras panel shows cameras located near the current camera, on the map or on the building plan.
To watch video from a nearby camera:
-
In the player, open the options list (16) and select Show nearby cameras.
The Nearby cameras panel opens to the right of the video.
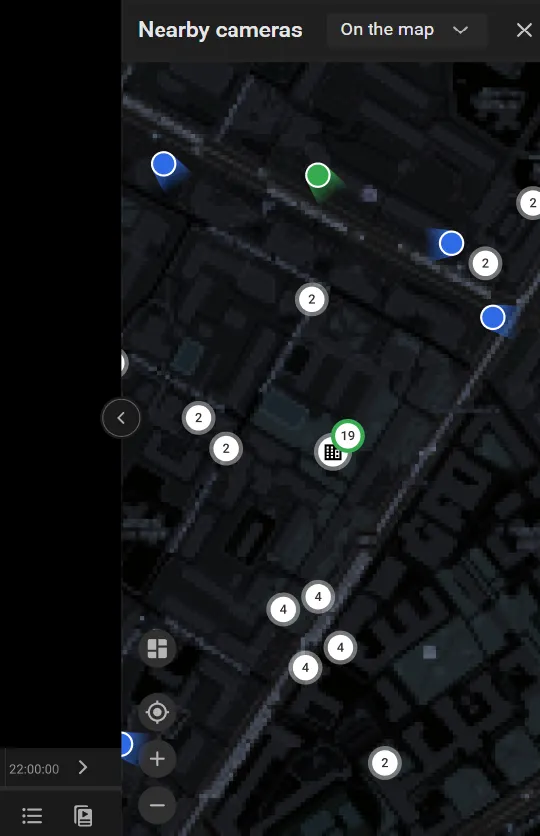
The panel has two views:
- On the map: the map shows cameras and building icons. Hovering over a building icon shows that building’s plans. Selecting a plan in the list opens the floor plan, where a camera can be selected to open its video.
- As a list: cameras appear as cards. When the list is opened from the map, it shows the cameras from the part of the map that was visible. If a plan was open, the list shows the cameras on that plan.
Use the following buttons to move around the panel:
-
 returns to the current camera on the map.
-
 opens the building plan where the current camera is placed. The button appears on the map when the current camera is placed on a building plan.
-
 shows the whole building plan. The button appears on the building plan.
-
 returns from the building plan to the map.
-
 returns from the building plan to the map, centered on the current camera. The button appears on the building plan.
-
 and
and  zoom the map or building plan in and out.
-
Select a camera on the map or the building plan, or a camera card in the list, to open its video.
The player opens the video of the selected camera:
- Live, if the current camera was streaming live.
- At the same point in the archive, if the current camera was playing the archive.
- Paused at the same point, if the video of the current camera was paused.
Search Events in the Video Archive
The new player can search the video archive for events. Search is available for these video analytics modules when Save tracks or Save abandoned items is turned on:
To search the archive:
- In the player, select the control that opens the events panel (17).
- On the panel, open the Search in archive tab.
-
Select a search mode: Line crossing, Motion in region, or Abandoned item. The modes shown depend on the video analytics module turned on for the camera, and on whether Save tracks or Save abandoned items is turned on.
- Line crossing: Draw a line on the player. An event is created when the line is crossed. The arrows on the line set the crossing direction.
- Motion in region: Draw a polygon on the player. The search looks for motion inside the polygon.
- Abandoned item: Draw a polygon on the player. The search looks for an abandoned item inside the polygon.
- On the timeline, set the time range for the search.
- On the Search in archive tab, select Search.
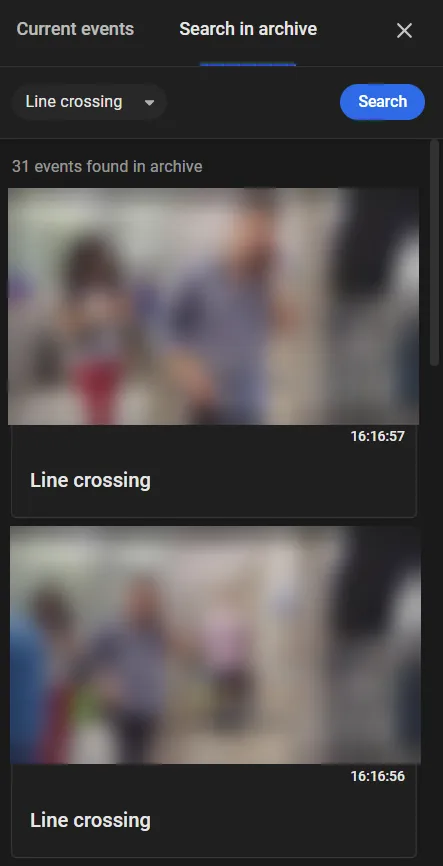
Results run from newest to oldest. Scrolling down the list loads earlier events.
The result list starts with how many events the search found, for example 31 events found in archive.
Each event card shows:
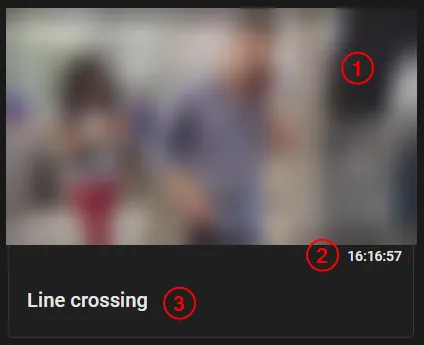
1: Video frames with the line or region used for the search.
2: Event time.
3: Event name. The name matches the search mode.
The options menu for an event includes these actions:
- Download frame: Downloads the video frame as a JPEG.
- Copy link: Copies a link to the event.
Opening the search panel again in the same player session shows the previous search results.
User Menu
Click User menu to access:
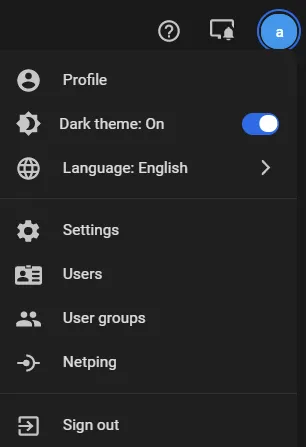
- Profile — User details
- Theme (light/dark)
- Language
- Settings — User settings
- Users — User management
- User groups — Group management
- Netping — External devices
- Collaboration: resource groups
- Sign out — Log out of the platform
Platform Settings
Click the Settings in the User Menu to open the Settings screen, which manages users, user groups, extra resources, map marks, and much more.
Build a Video Layout
Use layouts to prioritize selected cameras by allocating more screen space (video wall mode).
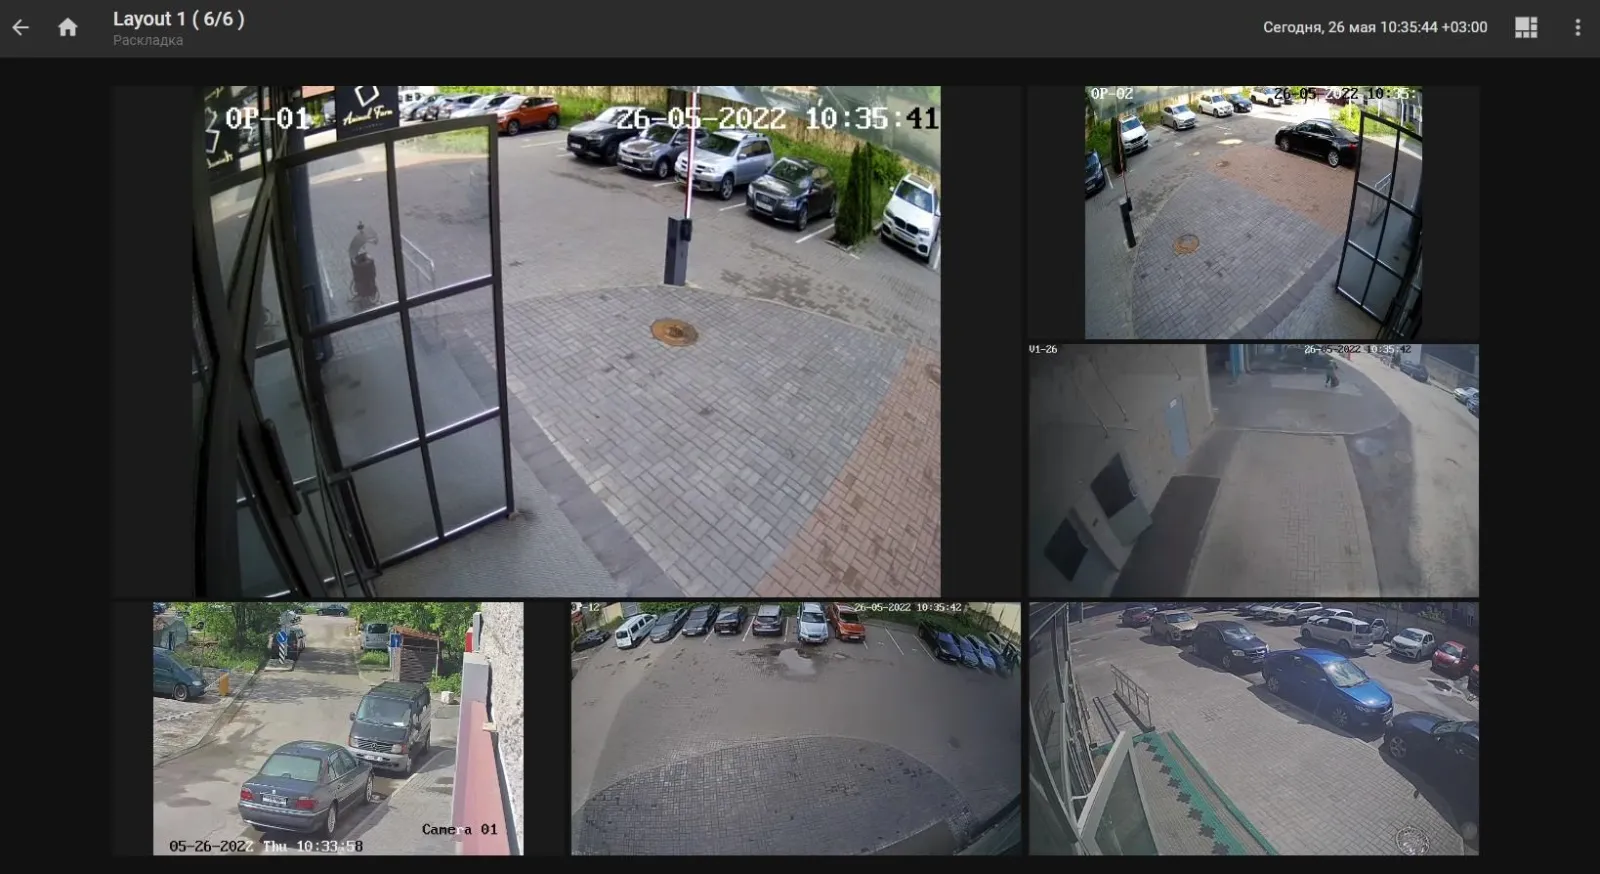
Layout mode is intended for watching videos from multiple cameras on one screen at a time. Zooming, switching cameras, and viewing streams are available, but analytics features are unavailable.
To create a layout:
- In the main menu, click Layouts. The list of layouts opens.
- On the Layouts page, click +.
-
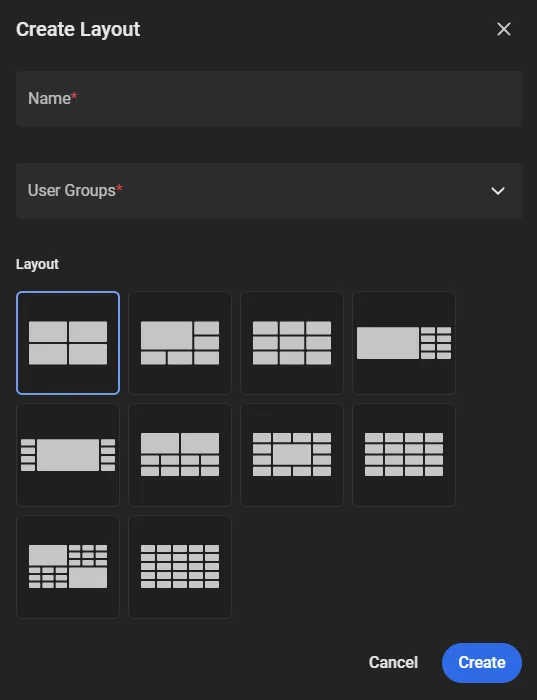
In the Create Layout window, fill in the fields and click Create:
- Name: layout name.
- User Groups: the user groups that receive access to the layout.
- Layout: template for how cameras are arranged on the screen.
-
On the created layout that opens, select a cell marked with + to add a camera.
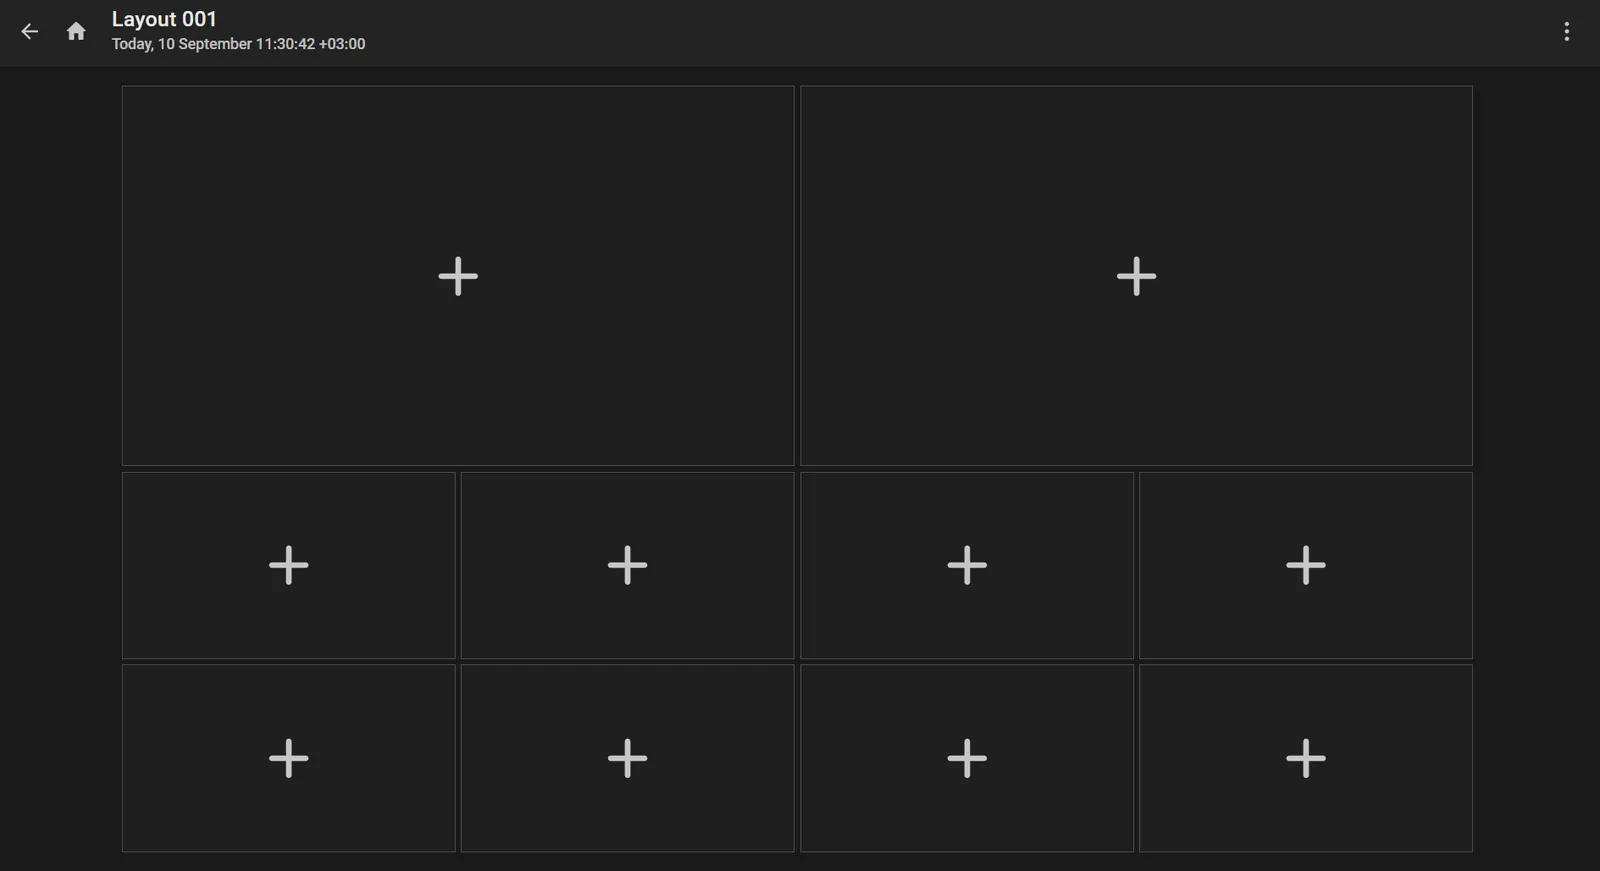
- In the dialog that opens, select a camera and click Add.
-
Add the remaining cameras the same way, according to the selected template.
The created layout is saved automatically.
Log Out
To log out of IREX, select Sign out in the user menu.