
Get Alerted in Real-Time
Video analytics modules of IREX process videos from external sensors to output a powerful, continuous stream of events, some of which might need a response from the user in real-time whereas others may wait until the time comes for a post-incident investigation. Real-time response events will be hereinafter referred to as alarms; they are shown on alarm monitors - virtual spaces that facilitate easy access to fires, gun detections, severe traffic incidents, wanted person appearances, etc.
Good Alarm Monitoring Practices
In big systems, the overall event stream far exceeds human capabilities to process it in real-time. Essentially, alarm monitors are the tools to separate a sub-stream (-s) that one human or a team can manage. Therefore, monitors should be built to account for the available human and technical resources at the user's, response time regulations, mandatory alarm verification routines, and many other factors, of which ethical principles are of supreme importance.
The only general recommendation possible is to set up monitors in such a way that the typical new alarm frequency would stay within the alarm processing capability of the response team. For instance:
- Do not allow too many cameras on one monitor; e.g., if the area under surveillance is too vast, split it into smaller districts by the "one district per one monitor" principle.
- Long person lists may produce too many face recognition events, so add more monitor filters, e.g., by location, or split the lists into shorter sub-lists.
Alarm Screen Layout
Click the Alarms on the main menu to open the alarm screen.
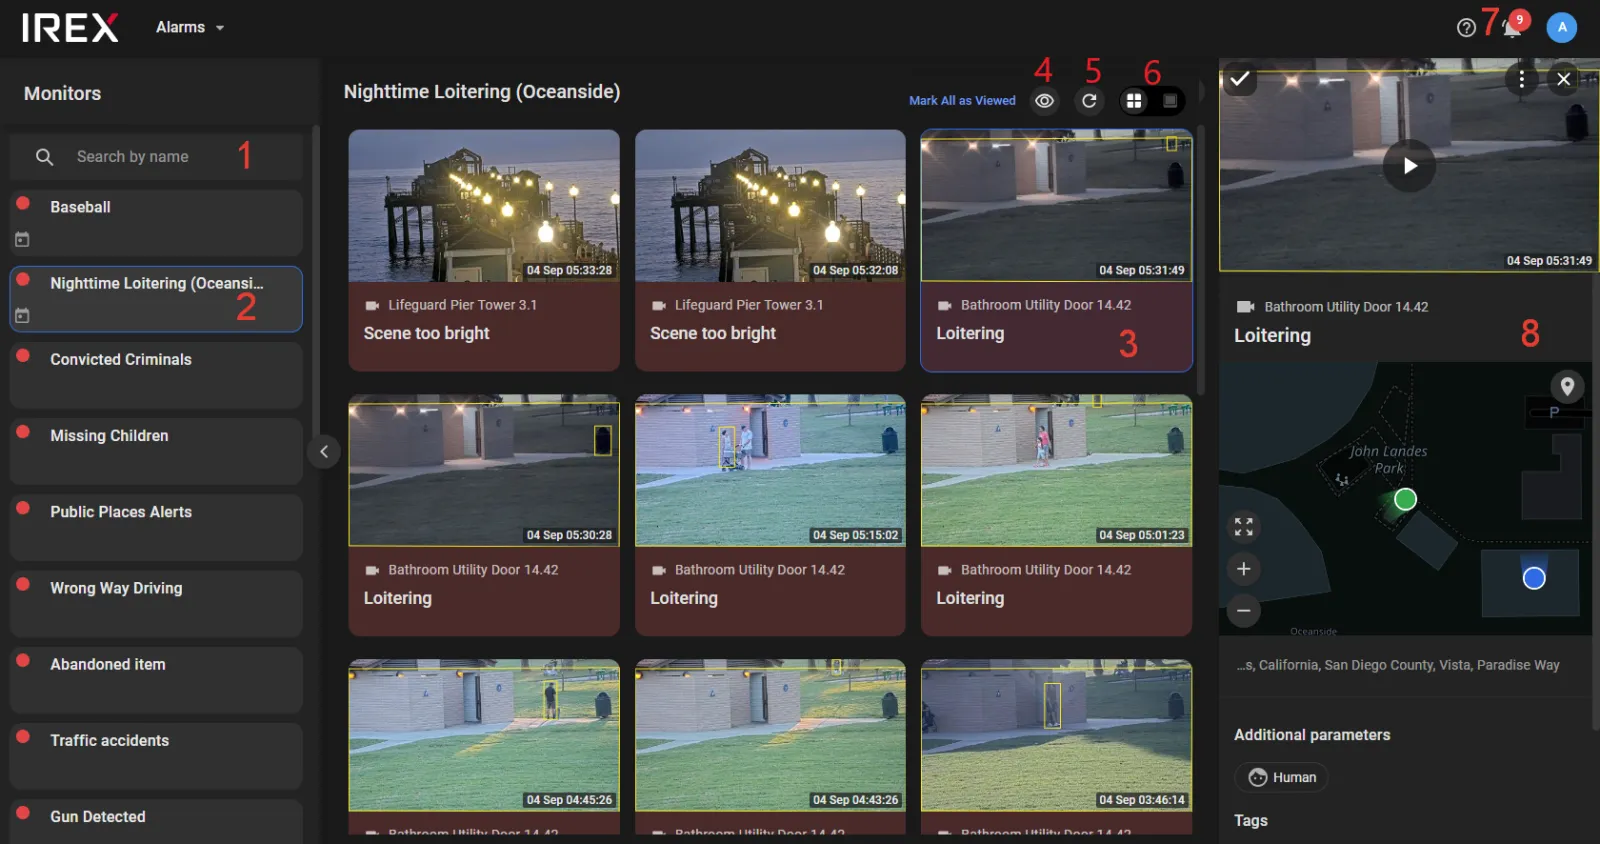
The key elements of the screen are:
- The list of alarm monitors ( 1) available to the groups the currently signed-in user belongs to.
- Currently viewed monitor (2).
- Event (alarm) cards on the monitor (3); the background of the cards shows dark red for unviewed alarms.
- The Hide viewed button 4.
- The Auto-update button (5)
-
The One-by-one/as List screen layout switches (6)
- Unread alarm indicator (7), where "N" is the number of monitors holding unread alarms.
- Alarm details sidebar (8); click a card to open it.
Process an Alarm
Unread Alarm Indication
An alarm might need a quick response from the user; to make sure that an alarm like this is not missed, graphical indicators are shown on the Alarms screen:
-
Monitors holding unread Alarms are on top of the Monitors list (1) marked with a
 sorted from top to bottom by alarm time.
-
Click the
 (6) to open the list of such monitors categorized "Active"/"Not active".
- Unread alarm card are shown shaded dark red.
Review a Read Alarm
Review an alarm using the commands in the three-dot menu on the alarm card.
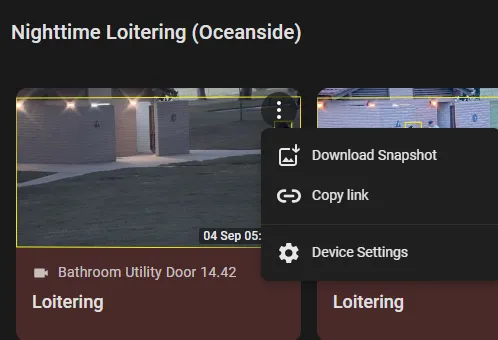
- Download snapshot — to save the alarm snapshot on the local drive.
-
Copy link — to copy to the clipboard a "short" link to the event playback in the
media player, e.g. as:
https://platform.com/short/3Gfgd7y - Device settings — to check the video analytics settings on the spotting camera.
Mark an Alarm as "Read"
To read (view/acknowledge) an alarm:
- Click the alarm card to study it in full detail on the pane that opens on the right.
- Click Mark as read as shown - the color shading fades away.
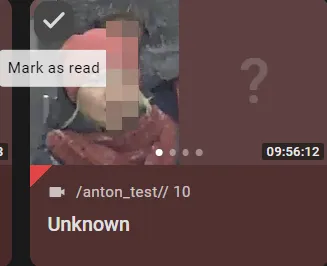
To read (view, acknowledge) all alarms on the monitor at a time, e.g. on a monitor outside the current user's responsibility, click Mark all as viewed.
Show/Hide Read Alarms
To hide all read alarms, e.g. to free space on the screen for those not read yet, press the button 4. Release it to bring hidden alarms back onto the screen.
Update Alarms on a Monitor
By default, the array of alarms is shown "as is" at the moment the monitor screen is opened and then stays unchanged. However, new alarms may come while the user is processing the previous ones. If so, the New events indicator appears; clicking it manually updates the array of alarms.

The other technique is to press the Auto-update button 5, thus making the alarm updating automatic. This means that new alarms will be arriving on the monitor as soon as they really occur, i.e. in real time, while the user keeps on dealing with the previous ones.
Making a choice between manual and auto-updating is far from trivial. It depends, in a general sense, on each specific user's circumstances, such as typical new alarm periodicity, how long it typically takes to process an alarm, and many other factors. So, this choice should account for the recommendations regarding good alarm monitoring practices.
Manage Alarm Monitors
Any managing action with an alarm monitor requires a Case ID to be provided.
To open the list of created alarm monitors, select User Menu > Settings > Alarm Monitors.
Selecting a monitor in the list opens a side panel on the right with that monitor's details. The panel shows status, alarm limit, and the filters configured for that monitor.
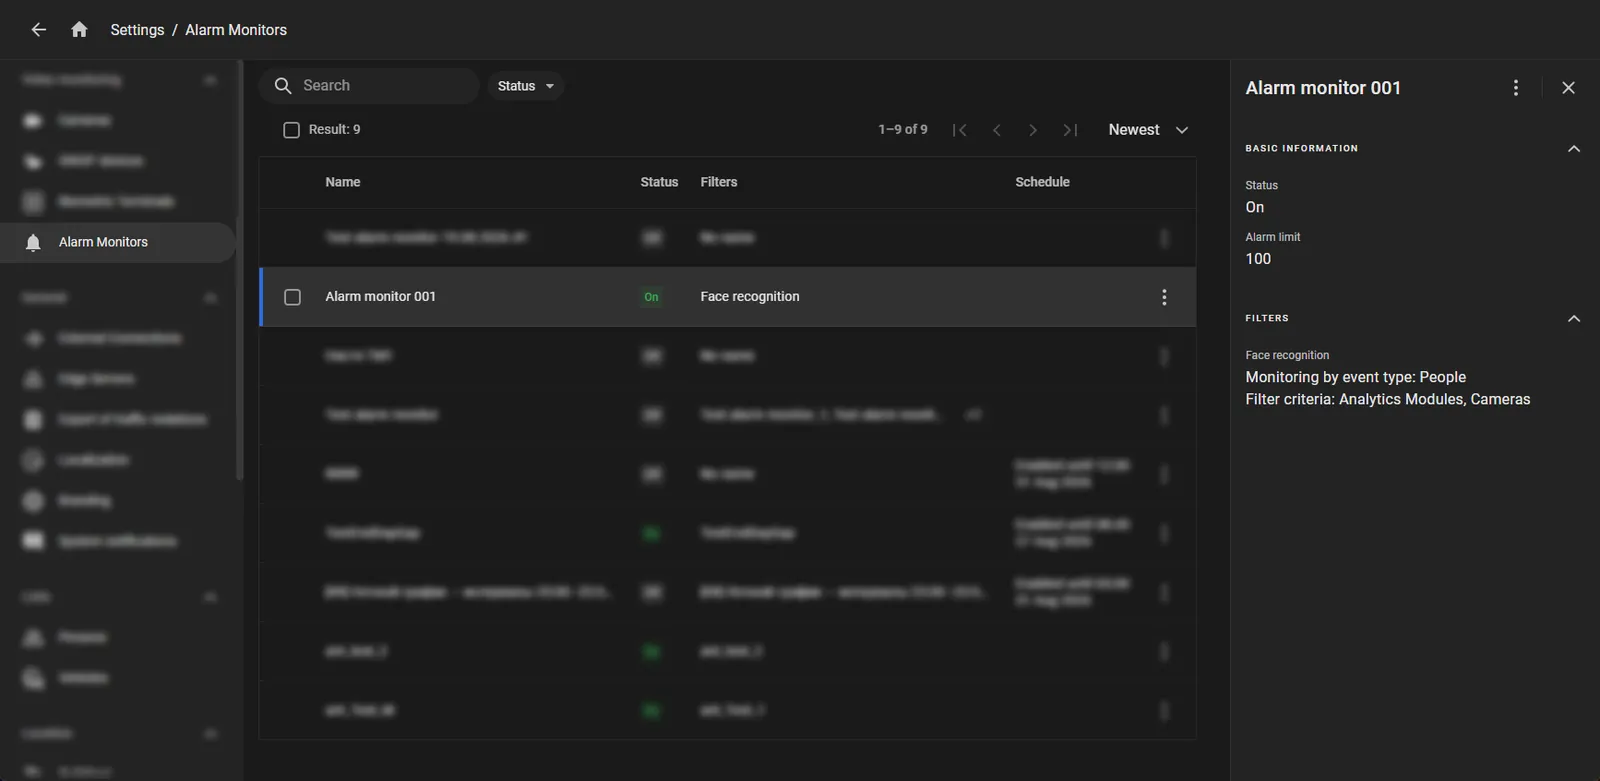
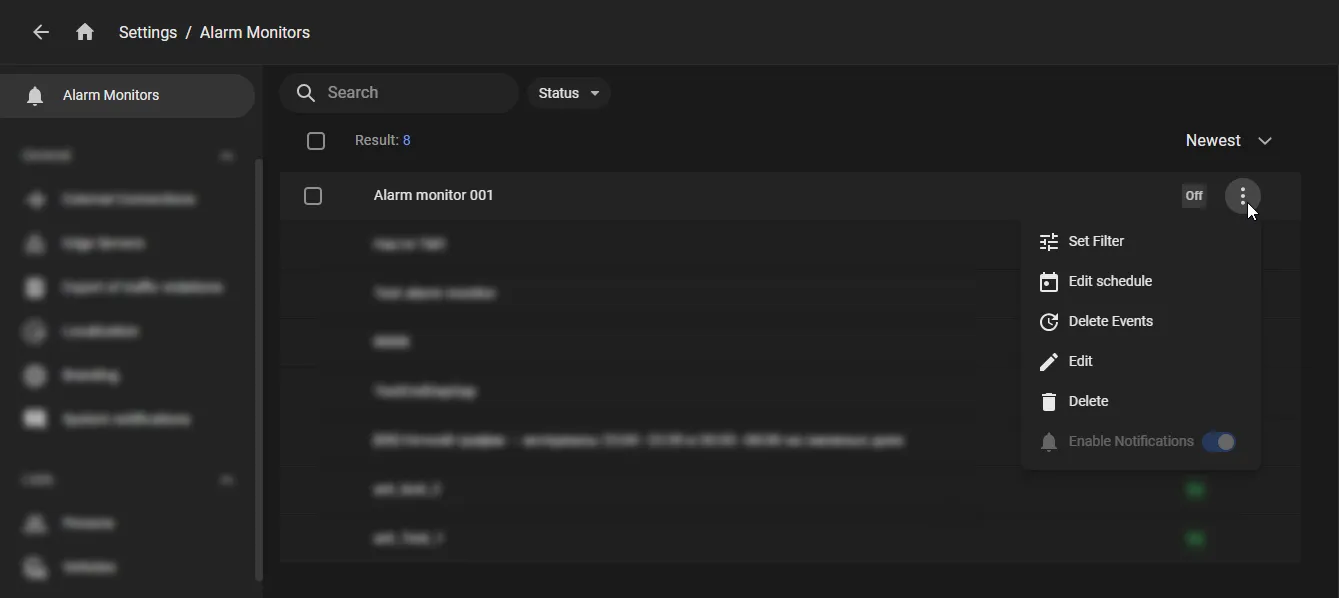
Monitor management commands are located in a three-dot menu on the User Menu > Settings > Alarm Monitors screen ...
... or right on the monitor list:
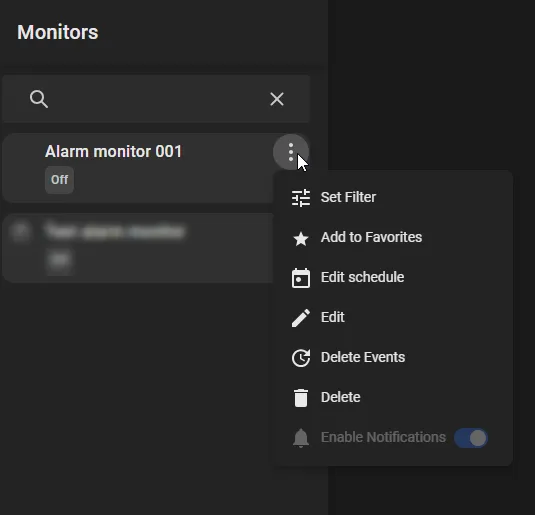
- Turn off — turns the monitor off
- Configure filter: when the monitor has at least one filter, opens a submenu of filter names; selecting a name opens that filter. Without edit permission, View filter settings appears instead.
- Create new filter: opens the window for creating a filter. The item is hidden without edit permission. It is unavailable for a locked monitor and when the filter limit is reached.
- Add to Favorites — adds the monitor to the list of most frequently used monitors.
- Edit schedule — to schedule the monitor activity.
- Edit — to change the monitor metadata
- Delete — to delete the monitor.
Favorite Monitors
It makes sense for a user to mark his or her most frequently used monitors as "Favorites"; this moves such monitors to the top of the list:
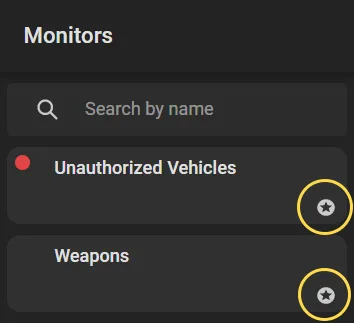
To do so, run Add to Favorites in the three-dot menu.
Up to 5 favorite monitors are allowed.
Response Protocols
An alarm monitor can be assigned a response protocol, which is a textual reminder to the operator about what to do when an alarm fires on the monitor. To view the response protocol for a monitor, click View protocol in the three-dot menu.
The final decision about what actions to take in response to an alarm on a monitor is left to the user.
The response protocol for a monitor is defined when the monitor is created. To edit it later, run the Edit command in the three-dot menu on the Settings - Alarm monitors screen and edit the text of the protocol in the monitor metadata window that opens.
Schedule Monitor Activity
An Alarm Monitor can turn on and off automatically on a schedule.
To set up the Alarm Monitor schedule:
-
Select Edit schedule in the Alarm Monitor options menu. The schedule settings page opens.
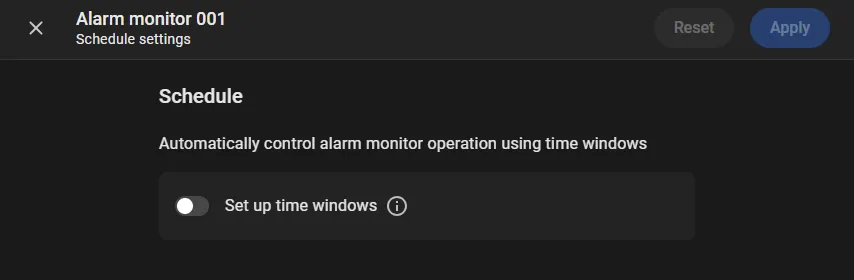
- Enable Set up time windows.
-
To add a time window, select a tab:
- Days of the week: time windows on specific weekdays during which the monitor is on.
- Dates: time windows on a specific date during which the monitor is on. If a date on the Dates tab overlaps a weekday time window on the Days of the week tab, the weekday time-window settings are not applied on that date.
-
Click Add:
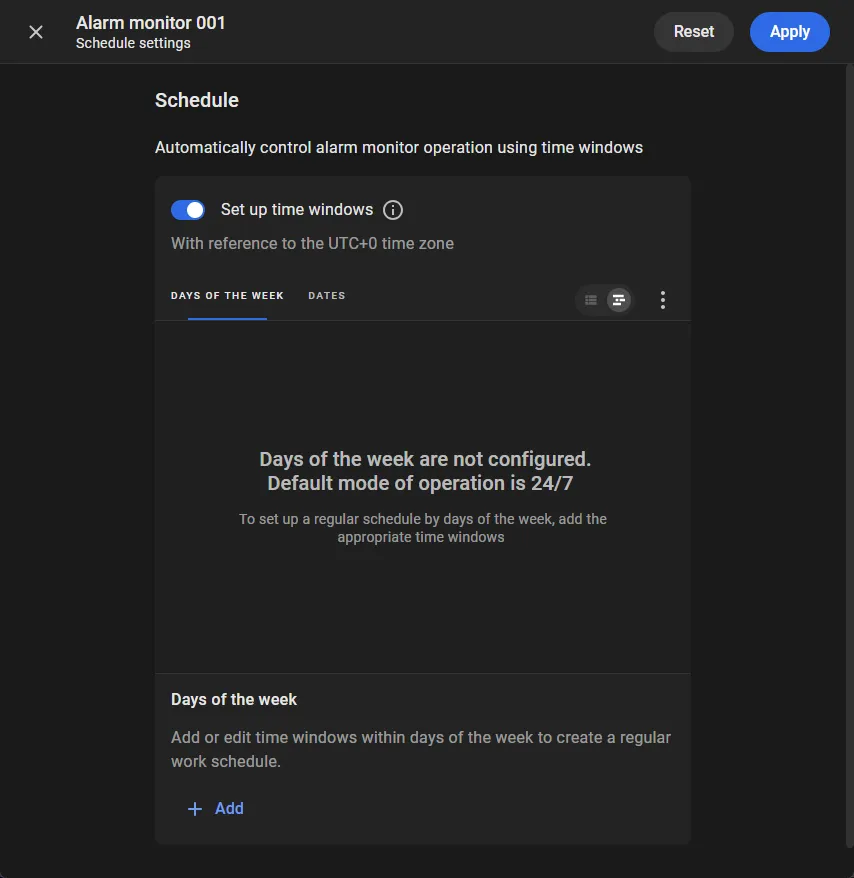
- On the Days of the week tab, select a day of the week and set a time window for it. Click Confirm.
-
On the Dates tab, select a date and set a time window for it. Click Confirm.
An unlimited number of time windows can be added, provided they do not overlap in time on the same tab.
If a date on the Dates tab overlaps a weekday time window on the Days of the week tab, the weekday time-window settings are not applied on that date.
After the time window is confirmed:
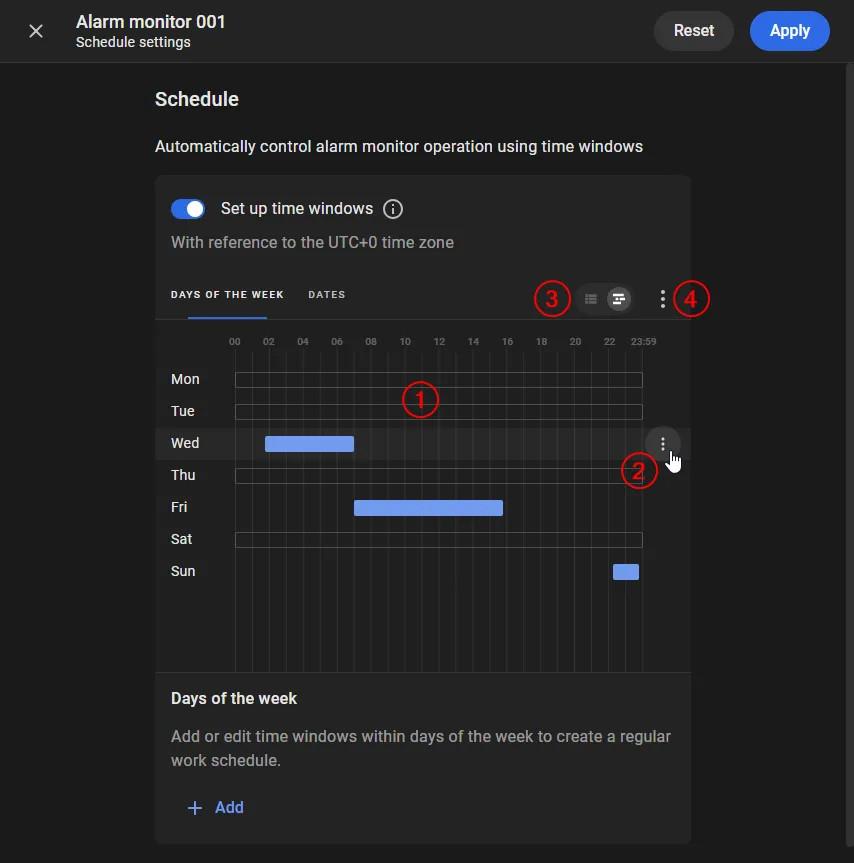
1 — the time window is added to the schedule.
2 — the options menu for a day of the week or date includes the following:
- Add time window: add a window on the selected day or date.
- Copy on days / Copy on dates: copy created windows to other days or dates.
- Clear time windows: remove windows on the selected day or date.
- Delete date: remove the date from the settings. Available on the Dates tab.
3 — the schedule display mode can be set to List or Chart.
4 — the settings menu includes the following options:
- Clear all: remove all created time windows on the Days of the week and Dates tabs.
- Export: download a JSON file with the configured time windows.
- Import: upload a JSON file with time-window settings. After import, the intervals from the file are applied, and existing intervals are removed.
- Click Apply to save the schedule.
The monitor can also be turned on and off manually with Turn on / Turn off. Manual turn on or turn off does not disable the schedule; it temporarily overrides it. The system applies the schedule again when the nearest time window starts or ends.
Unblock a Blocked Monitor
If the new alarm rate on a monitor exceeds a predefined limit of 12 alarms per second, the monitor gets automatically blocked in order to save the computational resources from overload. This may happen because of the incorrect monitor or camera set up, malfunctioning communication channels, or other problems, to be investigated and resolved later.
The blocked monitor indicator is shown right on the front page to let the user know about the situation he or she should pay attention to.
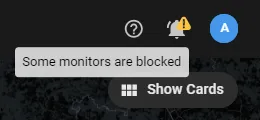
Click the "bell" to open the list of the blocked monitors ...
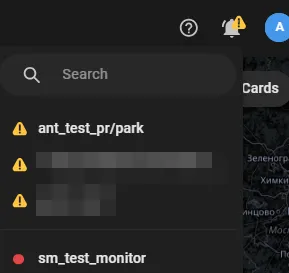
... then go to the Alarms screen to see such monitors on the list.
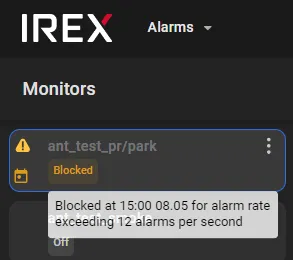
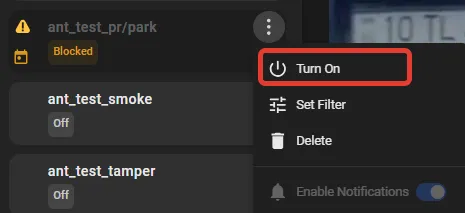
After the situation with too high an alarm rate is resolved, click Turn on as shown to manually reactivate the monitor.
Edit Alarm Monitor Metadata
To edit the metadata of a monitor, such as name, response protocol, event number limit, and options to send events to external systems, click Edit in the monitor options menu.
User groups' access to a monitor cannot be changed this way; do so in the program settings.
Create New Monitor
-
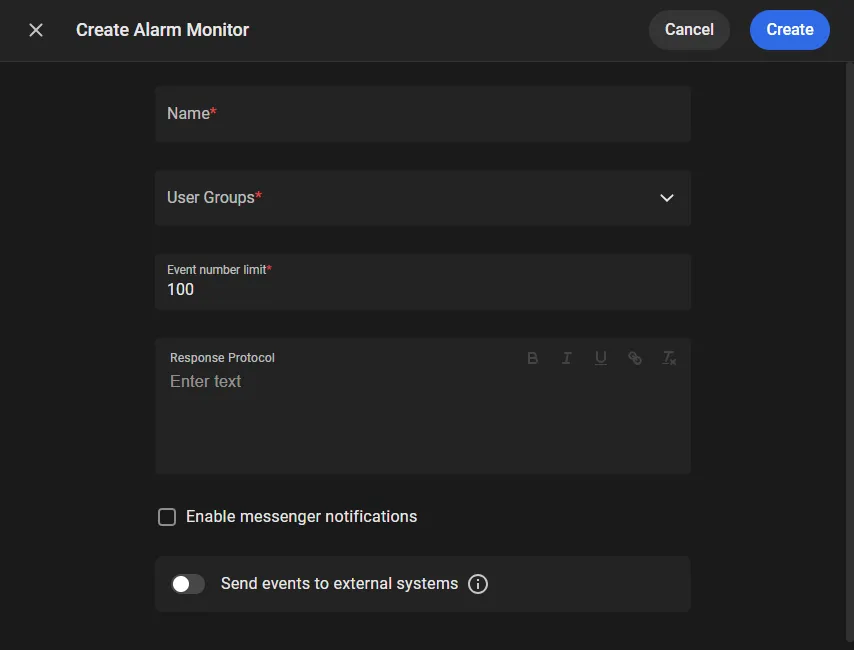
Open User Menu > Settings > Alarm Monitors and click + in the lower-right corner. The Create Alarm Monitor window opens.
-
Fill in these fields:
- Name: a name for the Alarm Monitor.
- Response Protocol: text that describes the actions to take when events appear on this monitor. After the monitor is created, that text is in the options menu under View Protocol.
- User Groups: groups to grant access to this Alarm Monitor.
- Event number limit: how many events the Alarm Monitor can hold (10–100).
-
Turn on these options if needed:
- Enable messenger notifications: send alarm notifications to the messenger.
-
Send events to external systems: send Alarm Monitor events to an external system over HTTP.
Turning the option on reveals these fields:
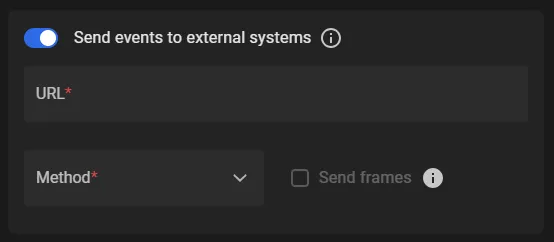
- Method: HTTP method sent to the URL (DELETE, GET, HEAD, OPTIONS, PATCH, POST, PUT, TRACE).
- URL: destination for the notifications.
- Send frames: include a video frame. Available only for the POST method.
The rest of the setup is under Send Events to External Systems.
- Click Create. The new monitor appears in the list on Settings > Alarm Monitors.
-
Alarms appear on the monitor only after at least one filter is created. A filter controls which alarms appear. Each filter has its own name and criteria.
A monitor can have up to 8 filters.
In the Alarm Monitor options menu, click Create new filter. The Create new filter window opens. Select a category and set the criteria:
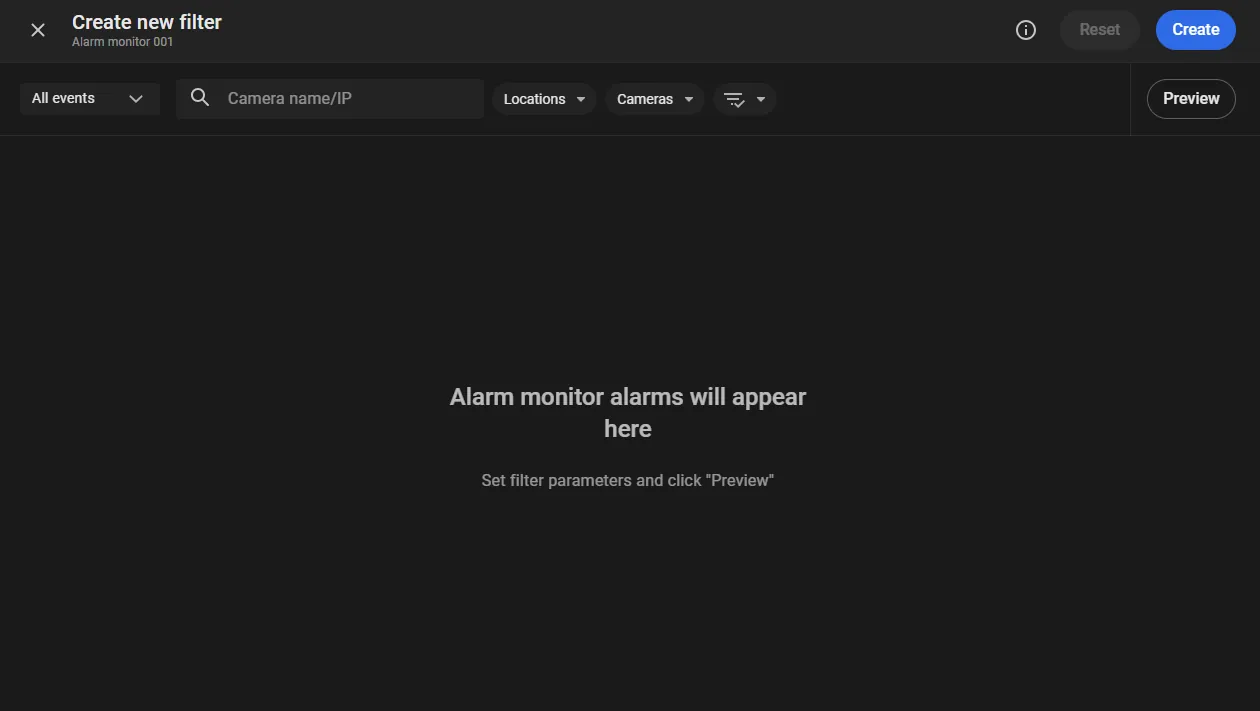
Filter categories:
- All events: video analytics events from the People, Vehicles, and Additional Events categories.
- People: events from the FaceTrack Pro module.
- Vehicles: events from the CarTrack Pro and Traffic lights modules.
- Additional Events: events from the remaining video analytics modules and from external connections.
- Traffic violations: alarms for traffic violations the platform records. These filters cannot be used on the same monitor as filters for other event types.
Available criteria depend on the category. Some appear at once; add the rest from Search criteria.
A filter cannot be saved unless at least one resource group and/or camera is selected.
- Resource Groups: groups whose cameras send events to the monitor.
- Cameras and places: where the events come from. In the Traffic violations category, this criterion is named Cameras.
- Analytics Modules: video analytics modules and the event types they generate. Available in People, Vehicles, and Additional Events.
- Person lists: which person lists to use. Available in People.
- Vehicle lists: which vehicle lists to use. Available in Vehicles.
- Sensor type: the device type events come from.
- Priorities: which event priorities appear on the monitor.
- Tags: event tags.
- Appearance: a person's appearance attributes (gender, estimated age, and others). Available in People.
- Color: vehicle body color. Available in Vehicles.
- Features: vehicle type and color. Available in Traffic violations.
- Brand: vehicle brand.
- State: country of registration for the vehicle plate.
- Speed, km/h: vehicle speed recorded in the events.
- Motorcyclists: how many people are on the motorcycle and whether safety gear is present.
- Objects: object types recorded in the events. Available in Additional Events.
- Violation Names: traffic violation types and names. Available in Traffic violations.
- Road Objects: road objects where violations are recorded. Available in Traffic violations.
Within one criterion, selected values use OR logic: a match with any one value is enough. For example, if Priorities includes Critical and High, alarms with either priority appear on the monitor.
Across different criteria in one filter, AND logic applies: an alarm must match every set criterion at the same time. For example, if Priorities and Cameras and places are both set, the alarm must have a selected priority and come from a selected camera.
Inside Appearance, Features, and Motorcyclists, nested parameters also use AND logic: the alarm must match every filled-in parameter at the same time.
Across separate filters on one monitor, OR logic applies: an alarm appears on the monitor if it matches at least one filter. - Click Preview to see which alarms will appear on the monitor and how fast they arrive, before saving the filter.
- Click Create, enter the filter name in the Create filter window, and click Apply.
- Turn the Alarm Monitor on: select Turn On in the options menu. Turn On appears after at least one filter has been created.
Stay Notified, Respond
Enable On-Screen Notifications
In the three-dot menu ⋮ on the User Menu > Settings > Alarm Monitors screen, click Enable notifications to get notified about new alarms on this monitor in a pop-up that emerges as shown below, no matter what the current configuration of the main screen is.
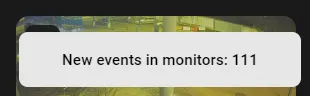
The application forwards alert notifications to appropriate chats on mobile devices, along with relevant snapshots and video links.
Get Notified on a Mobile Device
IREX interfaces with the Sover messenger to deliver real-time notifications about selected alarms from any location. An alarm message to Sover contains:
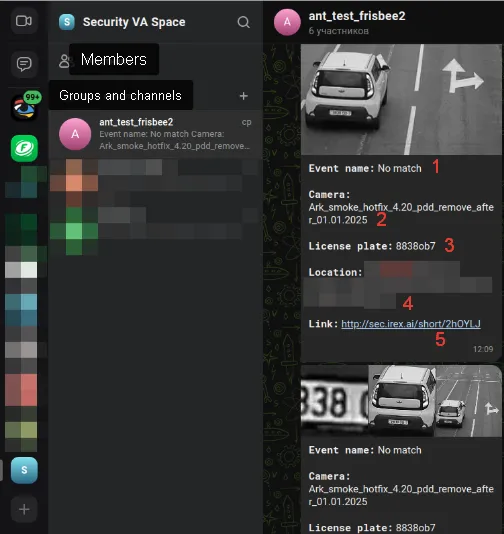
- Event screenshot
- Event name 1
- Camera name 2
- Extras (e.g. plate number of a car) 3
- Location 4
- The link to playback the event with IREX media player 5
To enable messaging to Sover, switch on the Enable messenger notifications option in the monitor editing or creation window.
However, alarm messaging needs the interfacing between IREX and Sover built and set up. Contact Sover support to do so; Sover support will also add the user as a member to the Sover security space.
That space contains group chats, each named after its own sending alarm monitor. Join the relevant chat, unmute notifications, etc., much like in any other messenger.
Send Events to External Systems
An Alarm Monitor can send events (and, when configured, frames) to an external system over HTTP as soon as an event appears on the monitor. For example:
- A "Match <name>" event on a camera at the entrance to an office triggering the command to open the door.
- A "Safety line crossed" event at a metro station triggering an audio warning to step back.
- A "Motion in region" event in a protected area triggering flashlight and audio alarms.
To do so:
-
Switch on Send events to external systems in the Alarm Monitor create or edit form.
- Select a method on the Method list (DELETE, GET, HEAD, OPTIONS, PATCH, POST, PUT, TRACE).
- Enter the destination URL in the URL field.
- For POST, switch on Send frames when frames must be included.
After the Alarm Monitor is turned on, events are sent to the user at the specified URL in .json format.