
Opposite Lane and Overtaking
If only Opposite lane should be captured, without overtaking, add an Opposite lane traffic object. To capture Overtaking as well, add both traffic objects: Opposite lane and Speed control zone.
The Opposite lane and Speed control zone traffic objects can be on one camera or on different cameras. If both are on the same camera, they must not overlap.
Cameras used for this control must have the CarTrack Pro module turned on.
Camera That Watches the Oncoming Lane
- Turn on the CarTrack Pro module.
-
On the module settings pane, on the Main tab, set the Region of interest: the part of the frame used for vehicle tracking and plate recognition. By default the Region of interest is the full frame.
- To move a vertex of the area border, drag it to a new position.
- To delete a vertex, double-click it.
- To add a vertex, double-click the existing border where the new vertex should sit.
- To move the whole area, place the cursor inside it and drag.
- On the Main tab, in Track, Recognize, select Track vehicles with a recognized plate.
- If violations should be captured only for selected vehicle types, turn on Vehicle type and color recognition on the Main tab. Vehicle types recognized by the module are listed in Find a vehicle by features.
-
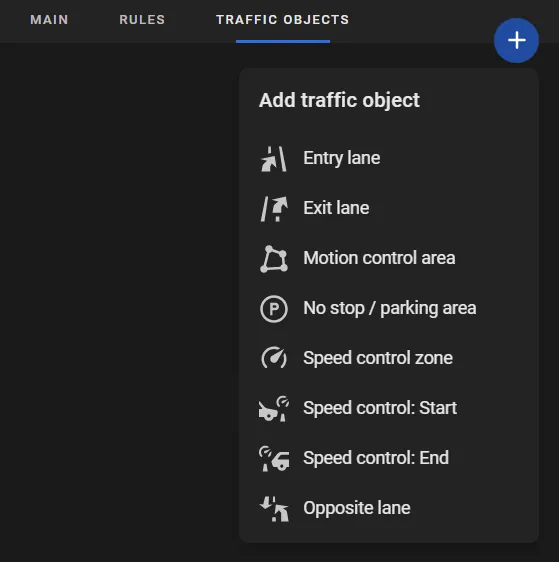
On the Traffic Objects tab, click Add traffic object > Opposite lane.
-
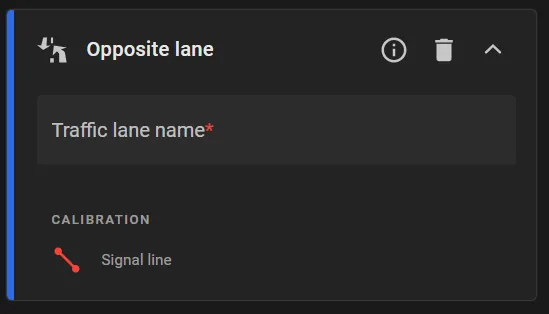
Enter the Traffic lane name.
-
Draw the Signal line (the control line used to capture a vehicle entering the oncoming lane) inside the region of interest, with these constraints:
- The Signal line must not sit too close to the border of the Region of interest set on the Main tab. The vehicle must be fully in view both when it crosses the line and shortly before, so the trajectory is visible before the crossing.
- Use the arrows on the Signal line to mark the allowed direction of travel in the lane.
- Click Apply.
Camera That Finds the Overtaken Vehicle
- Turn on the CarTrack Pro module if it is not already on for this camera.
- On the module settings pane, on the Main tab, set the Region of interest and, in Track, Recognize, select Track vehicles with a recognized plate, as above.
-
On the Traffic Objects tab, click Add traffic object > Speed control zone.
-
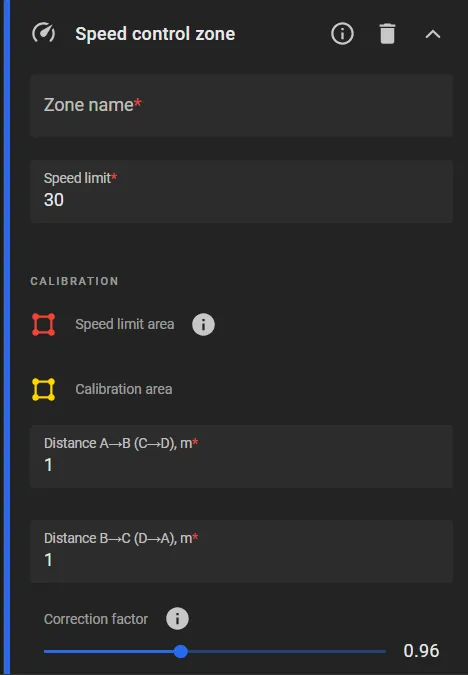
In the traffic object card, set the following:
- Enter the Zone name.
- Set Speed limit: the speed above which a vehicle in this zone is treated as the overtaken vehicle.
- Draw the Speed limit area on the lane of travel in the same direction: the area where the overtaken vehicle is found. The vehicle image must not be larger than 1/5 of the area.
- Draw the Calibration area (a four-point polygon A, B, C, D used to calculate speed) and, in Distance A→B (C→D), m and Distance B→C (D→A), m, enter the actual length of those sides in meters.
-
In Correction factor, enter a factor that corrects a systematic speed error if the Calibration area was drawn with an offset.
Speed is calculated from video analytics. The calculated value can differ from the actual speed of the vehicle. An incorrect or imprecise calibration area increases that error.
- Click Apply.
Next, bind the cameras that have an active, configured CarTrack Pro module to the road object as cameras of type Opposite lane / Overtaking, turn on control on the road object, and set the violation control rules.