
Manage ONVIF Devices
What ONVIF Is
ONVIF is a global and open industry forum that provides and promotes standardized interfaces for IP-based physical security products. ONVIF specifications are widely used as common communication interfaces between devices (such as IP surveillance cameras) and software clients (such as video management software). The interfaces enable ONVIF conformant products from different vendors to communicate with each other, giving system integrators and end users the flexibility to choose from a wide range of conformant products without being locked into a specific brand.
Connect to an ONVIF Device
An ONVIF device such as an NVR can expose multiple cameras over a single connection. Adding the device to IREX makes those streams available to video analytics. The next step is to select which video streams to process.
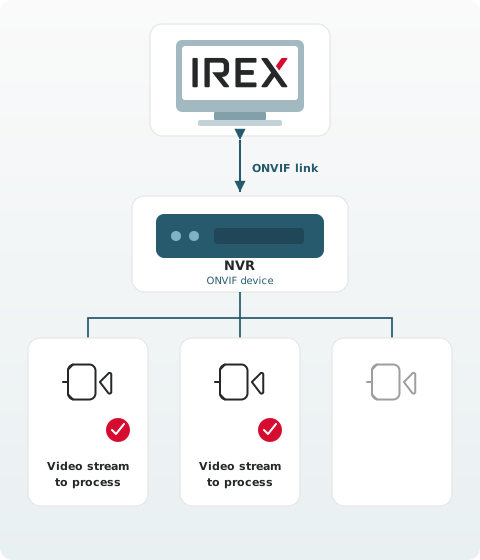
-
Open Settings > ONVIF devices and click +.
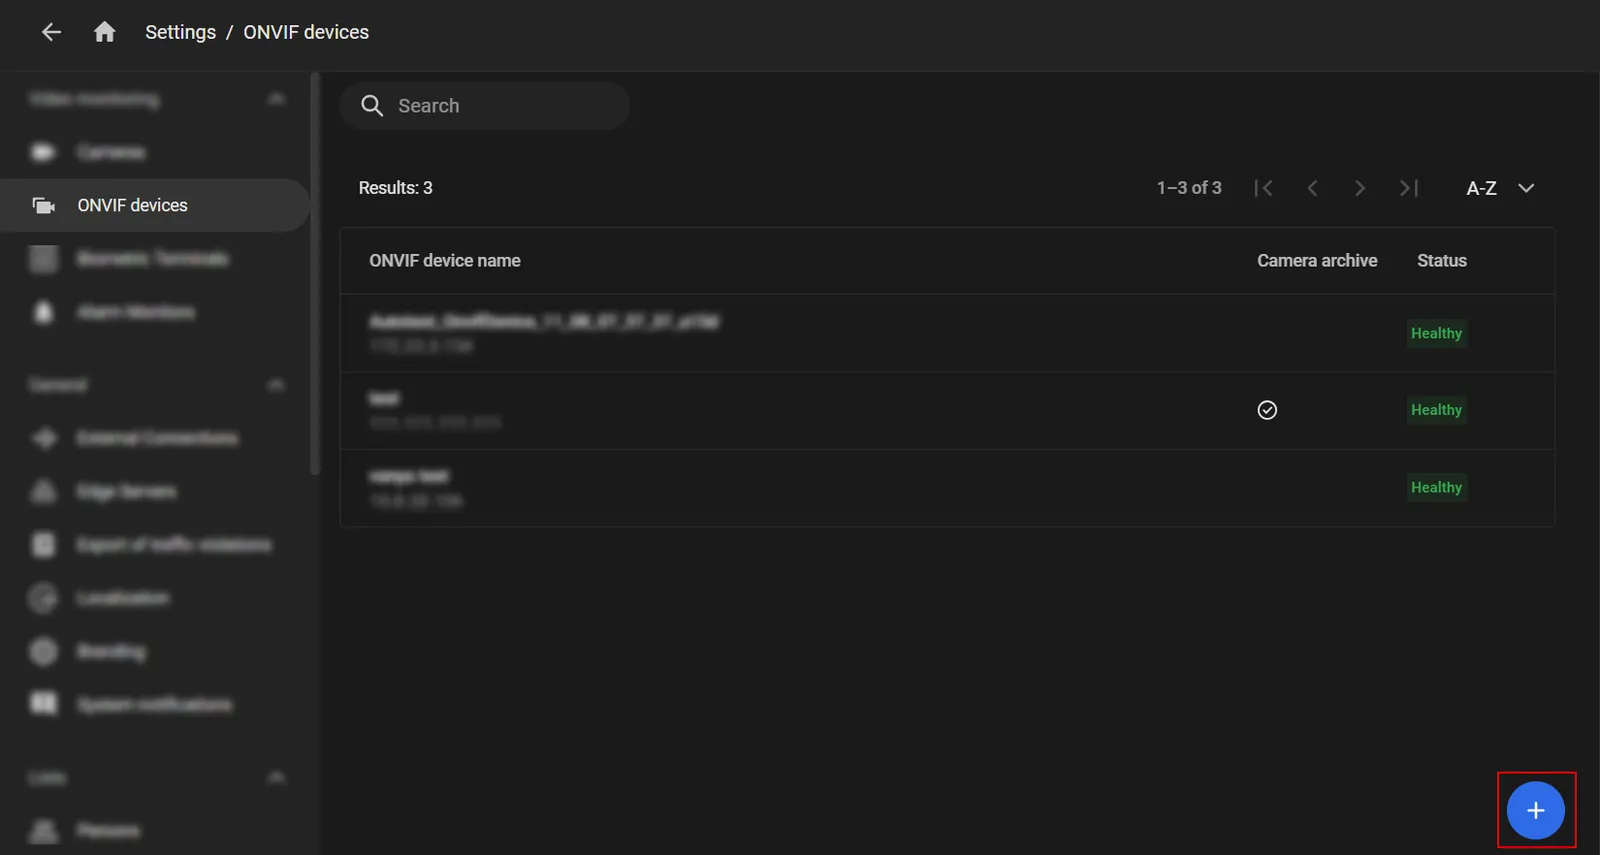
-
In the window that opens, complete these fields:
- ONVIF device name: enter a name for the ONVIF device.
- User Groups: select the user groups that should have access to the ONVIF device.
- ONVIF IP: enter the IP address of the ONVIF device.
- Login: enter the login used to connect to the ONVIF device.
- Password: enter the password used to connect to the ONVIF device.
- Enable access to the archive on the camera: turns on playback of the archive stored on the cameras of this ONVIF device. To play that archive later, open the camera player and, in the options list, select Video source > Camera archive.
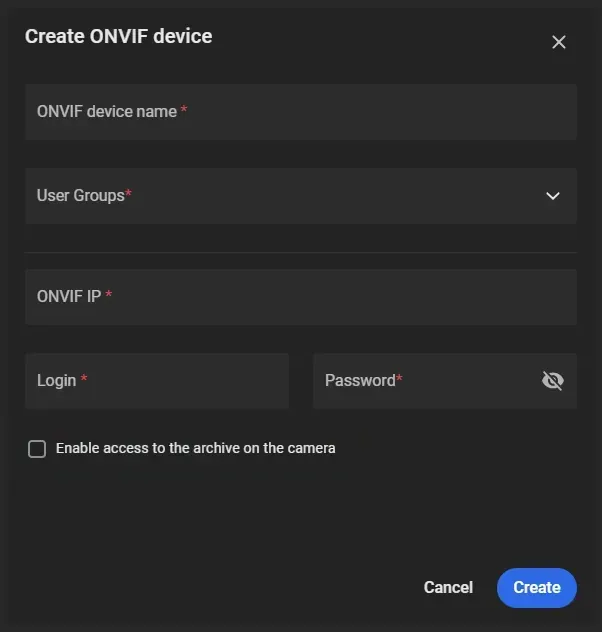
- Click Create.
Add Cameras for an ONVIF Device
- Open Settings > ONVIF devices and select the ONVIF device.
- In the Options menu of the selected device or on the side panel, select Add cameras.
-
In the window that opens, set the following:
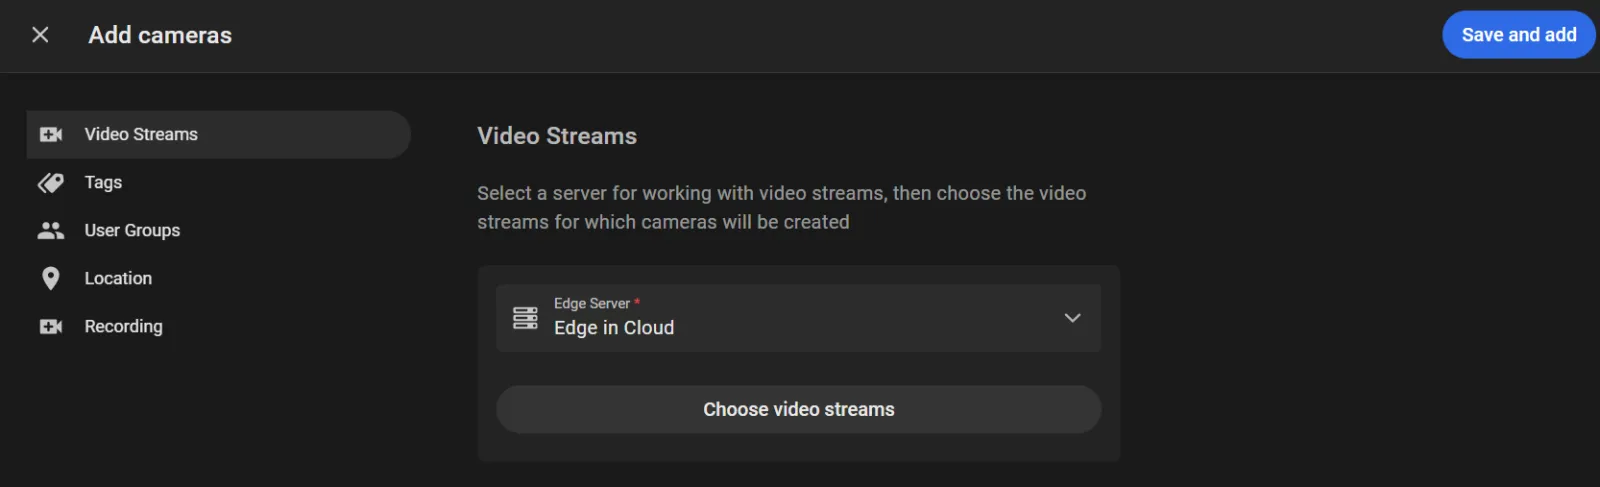
- Edge Server: select the server that will work with the video streams.
-
Choose video streams: click the button to select the video streams for which cameras should be created. In the window that opens, select the video streams and click Apply.
If the video streams fail to load, the Failed to load video streams message appears. Check the ONVIF device settings and connections, and retry.
For each selected video stream, enter a Camera name.
The settings below apply to all selected video streams.
- Tags: enter tags for the cameras.
- User Groups: select the user groups that should have access to these cameras.
- Location: place the cameras on the map and set their viewing angle by dragging the point on the camera icon.
- Record video: turn on the option to store video in cloud storage.
- Use only for viewing archive on the camera: select this option to create the cameras turned off, without recording video to the server, but with access to their archive. To start recording to the server later, select Turn on in the camera Options menu, then turn on Record video in the camera settings.
- Video storage depth: select how long video from the cameras is kept.
- Record with sound: turn on the option to record video with sound.
- Event storage depth: select how long events captured by these cameras are kept.
- Frame storage depth: set how long event video frames are kept. The value cannot exceed the event storage depth. After the frame storage period expires, the event card shows the default system image instead of the frame.
- Click Save and add.
Manage ONVIF Devices
Created ONVIF devices appear on Settings > ONVIF devices.
The Options menu for a selected ONVIF device in the list includes the following:
- Add cameras: opens the Add cameras form for the device.
-
Edit: change the ONVIF device name and IP address, the login and password used to connect, and the Enable access to the archive on the camera option.
Edit the ONVIF IP only if that address has actually changed. RTSP links to the video streams are then updated automatically.
-
Remove: removes the ONVIF device from the system.
When an ONVIF device is removed:
- Cameras created for the removed device stay in the system.
- Camera data (the video archive on the server and events) is kept.
- Video analytics settings and video archive settings are kept.
- RTSP streams become editable in the camera settings.
- The link between the cameras and the ONVIF device is broken.
Selecting an ONVIF device in the list opens a side panel with the cameras created from that device's video streams. Add cameras is also available on that panel.
The Options menu on a camera card on that panel includes the following:
- Go to Events: opens the events captured by that camera.
- Device Settings: opens the camera settings.
- Delete: deletes the camera.