
Navigate around Smart City
IREX protects airports, metro, railway stations, streets and highways, shopping malls, gas stations, stadiums, parks, and other public spaces scattered all around a Smart City. It displays geo-referenced information clearly, distinctly, and in full available detail, including single buildings and building plans. Functionalities are provided to quickly navigate between cameras of interest, view available plans, preview cameras, watch live video streams in full with reference to the exact location, and more.
Geo-referenced information is also available from other types of external sensors connected to the system, such as thermal and mobile cameras, video downloads, and others.
At start-up, map view shows the overview of the world map, on which cameras can be shown isolated or as clusters depending on the current map scale - the feature referred to as smart clustering. It helps keep the map distinct and clear.
Zoom in on a cluster or click the cluster icon to see it split into single cameras at a scale big enough.
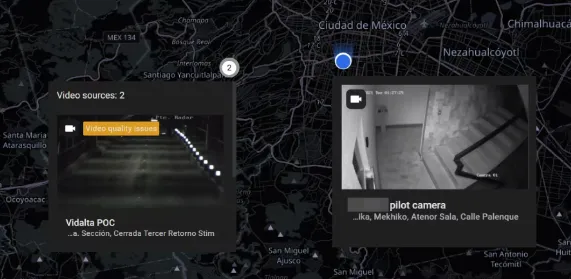
The icon of a camera on the map shows its view direction relative to the coordinate axis as well.
To zoom in and out on the map, use the "+" and "-"controls in the bottom-left corner of the screen, or rotate the mouse wheel.
To pan the map, drag and drop it by holding the left-hand mouse button pressed.
Camera Type and Status Icons
Above CCTV, the system allows connection to other types of external sensors (thermal, PTZ, video downloads, and some others). Each sensor type is represented on the map by its own icon; the color of the icon encodes the sensor status.
- Blue is for sensors up and running.
- Red is for those offline or "signal lost".
Search Cameras and Places on the Map
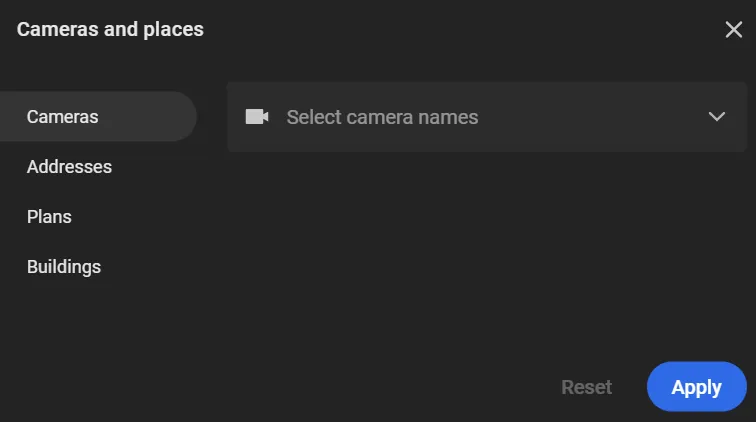
The Cameras and places filter searches cameras by name, address, floor plan, or building.
To find cameras on the map:
-
Click the Cameras and places filter. The Cameras and places window opens with the Cameras, Addresses, Plans, and Buildings tabs.
-
Select the required tab and select values on it. Start typing a value in the field and select it from the list. Multiple values can be selected:
- Cameras: search cameras by name.
- Addresses: search cameras by installation address.
- Plans: search cameras on a floor plan.
- Buildings: search cameras in a building.
- Click Apply. The map is rebuilt automatically so that the found cameras fit at the largest possible scale.
Buildings and Plans
"Buildings" and "Plans" are the kings of IREX extra resources shown as user layers over the map. They make it easier for the user to find locations of his or her regular interest.
Due to the smart clustering feature, buildings appear on the map only if the current presentation scale is big enough; zoom in on the map to see those.
Click the icon of a building on the map to see the building plans open, if available, e.g. in a floor-by-floor view. Plans hold camera icons to show the exact camera location and view direction.
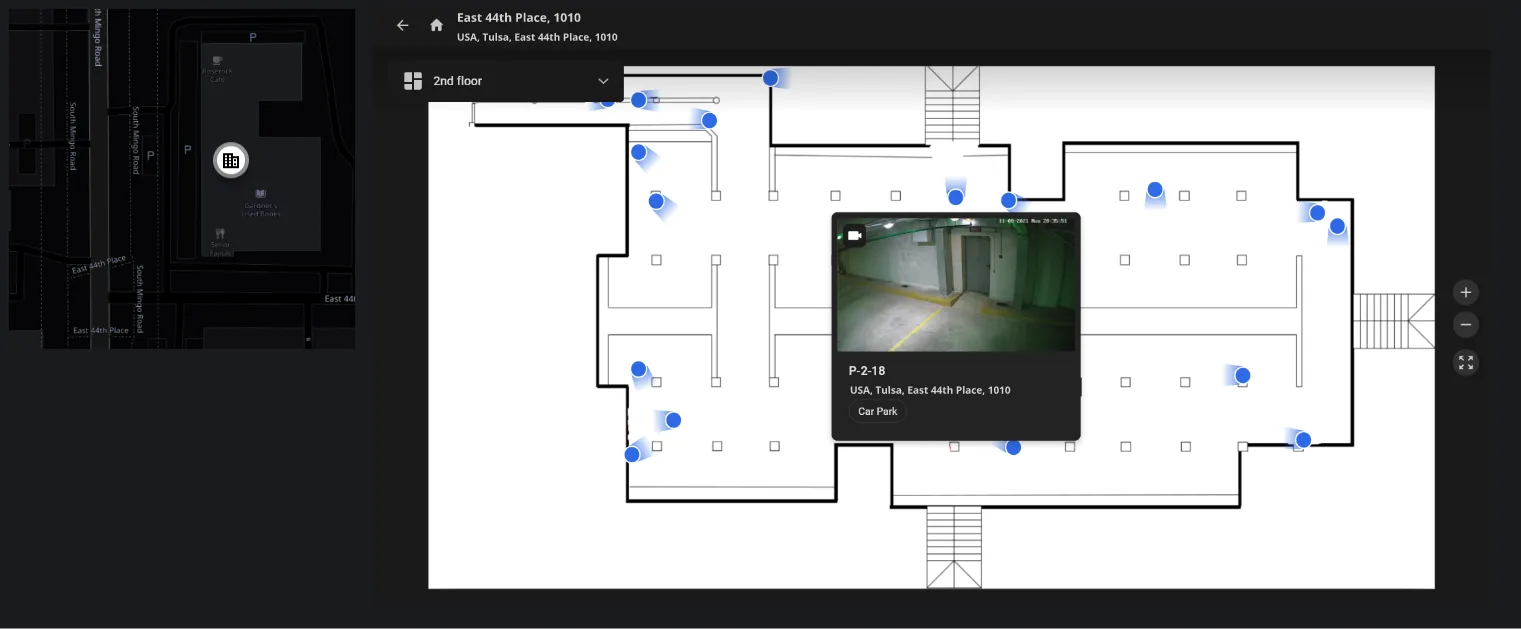
Point the cursor onto a camera on a plan to open a preview from the camera.
Preview Live Videos
Hover over a camera icon on the map to see a preview in a pop-up.
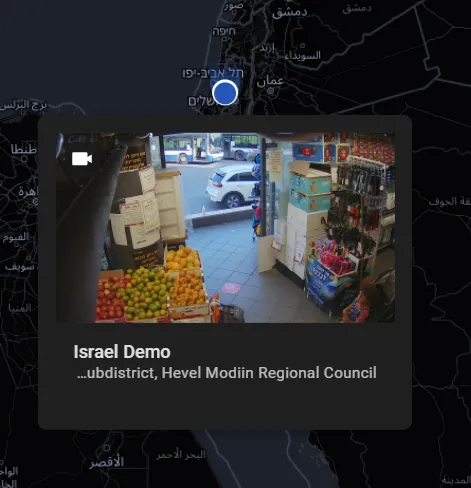
Click the icon of a camera to open live video streams in the media player.
Hover over a building icon on the map to see the preview from all cameras in that building in one pop-up; then scroll to the required one.
When on a plan, act by analogy to preview a camera or watch live video.
Map Marks
Map marks graphically indicate the locations of objects on the map that improve the operator's situational awareness in the area of an incident, thus helping them to respond adequately. These may be police stations, medical aid points, firefighters bases, etc. Each map mark belongs to a type (e.g. "Police station").
View Map Marks
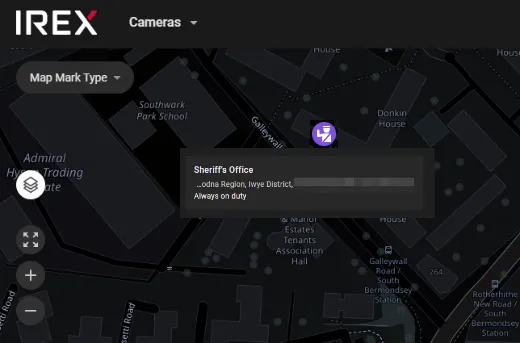
Click the User Layer button on the main screen as shown to display all available map marks. Hover over a mark to see its name, type and verbal description in a pop-up.
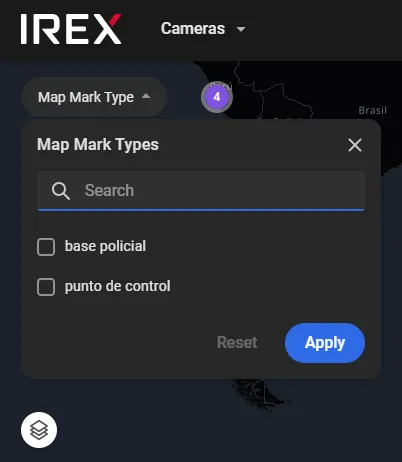
To leave shown only the marks of a type, checkmark the type under the Map mark type.
Manage Map Marks
Users in a Role of OPERATOR and higher can create map mark types and single marks to assign those to user groups.
Map mark and map mark type management actions are logged in every possible detail.
Create, Edit, Delete a Map Mark Type
- On the User Menu > Settings > Map Mark Types screen, click the "+" in the bottom-right corner of the screen ...
- In this window enter mark type title (e.g. "Police Station").
- Select the mark type icon from the icon library.
-
Select the user groups to assign the mark type to.
- Click the Create.
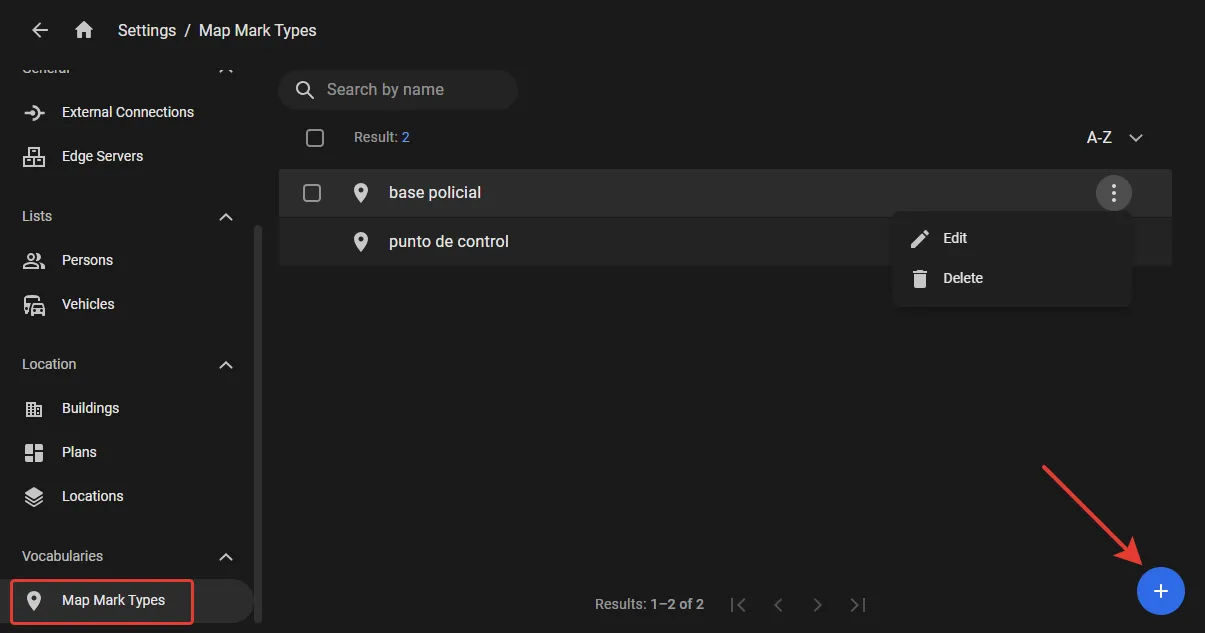
... to open the Create Map Mark Type window.
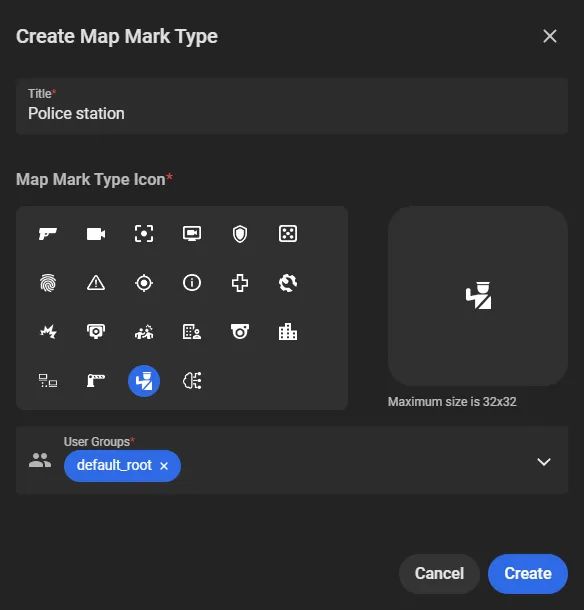
Selection is limited to other user groups the current user already belongs to.
To edit a map mark type, run the Edit in the three-dot menu and change the title and icon. However, user groups that have access to the type cannot be changed this way.
How to do so?
To delete a map mark type, run the Delete in the same menu.
Set a Mark on the Map
- Click the User Layer button on the main screen.
- Click the "+" in the bottom-right corner of the screen.
- Click the location of the new mark on the map - the Create Map Mark window opens
- In this window, select the mark type that the new mark belongs to.
- Enter the name of the mark (e.g. "Sheriff's Office").
- Select user groups to assign the mark to.
- Enter extra verbal details.
- Click the Create.
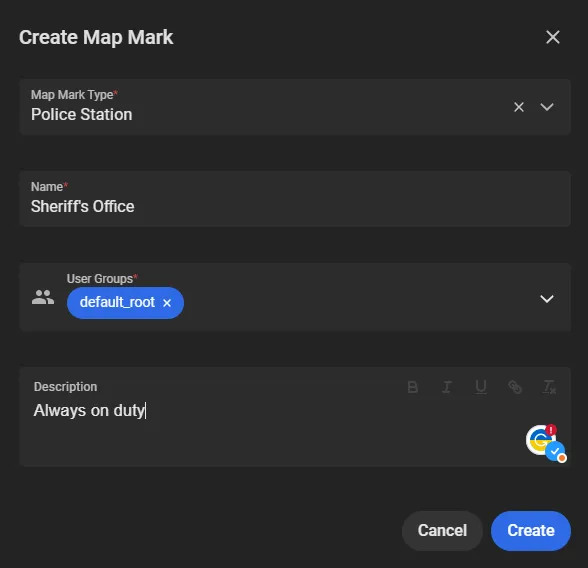
Those groups should be subgroups of the group that the mark type is assigned to.
Logging System Events with Map Marks and Types
Creation/deletion/updating of a mark type produces the following records to the system log:
- "Map mark type added/deleted/updated" in the Map Mark Type log section.
- "Access added/removed" in the User Groups section.
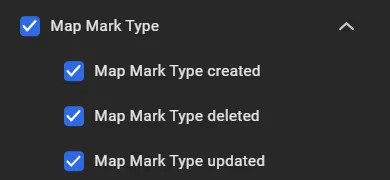
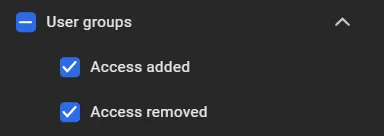
The same records appear in the Map Marks section of the log at creation/deletion/updating of a single mark.